Migrate from a connected source RMM to octoja
Bring customers, sites and devices from an existing RMM such as NinjaOne or Datto into octoja — connect both systems, mirror customers, then roll out the agent.
Written By Stefan Steuer
Last updated 28 days ago
octoja Migration brings the customers, sites and devices from your existing RMM into octoja without manual re-typing. You connect octoja and your current RMM once, mirror your customers across, then push a single installer command to your devices through your old RMM — each device resolves itself to the right octoja customer and enrolls on its own. This guide walks the full migration from start to finish.
How migration works
Migration runs in four stages, which map to the pages in the Migration panel:
- Mirror customers and sites — every customer in your source RMM is created in octoja, including its sites.
- Generate an installer command — you create one command, with an API key embedded, that you distribute to all devices through your RMM (Windows PowerShell or bash).
- Automatic resolution per device — when the command runs it reads the device's hostname and MAC address, asks the octoja resolver to look the device up in your source RMM, maps it to the matching octoja customer, makes sure a site exists and issues an enrollment token. The octoja agent then installs itself.
- Monitor progress — the Device Migration page lists every device from the source RMM with a live status, grouped per customer with progress bars.
Before you start
octoja Migration lives at migration.octoja.de. Access is currently granted on request — send your e-mail address to stefan.steuer@octoja.de and you'll be set up with an account.
Two things must be in place before you can mirror customers: an octoja connection and at least one connected source RMM. Both are set up in the steps below.
octoja Migration can read from the following source RMMs:
- Atera
- Datto RMM
- Kaseya VSA X
- Level.io
- N-able N-central
- N-able N-sight
- NinjaOne
- Riverbird RMM
- Server-Eye
More adapters are on the way.
Step 1: Connect your octoja instance
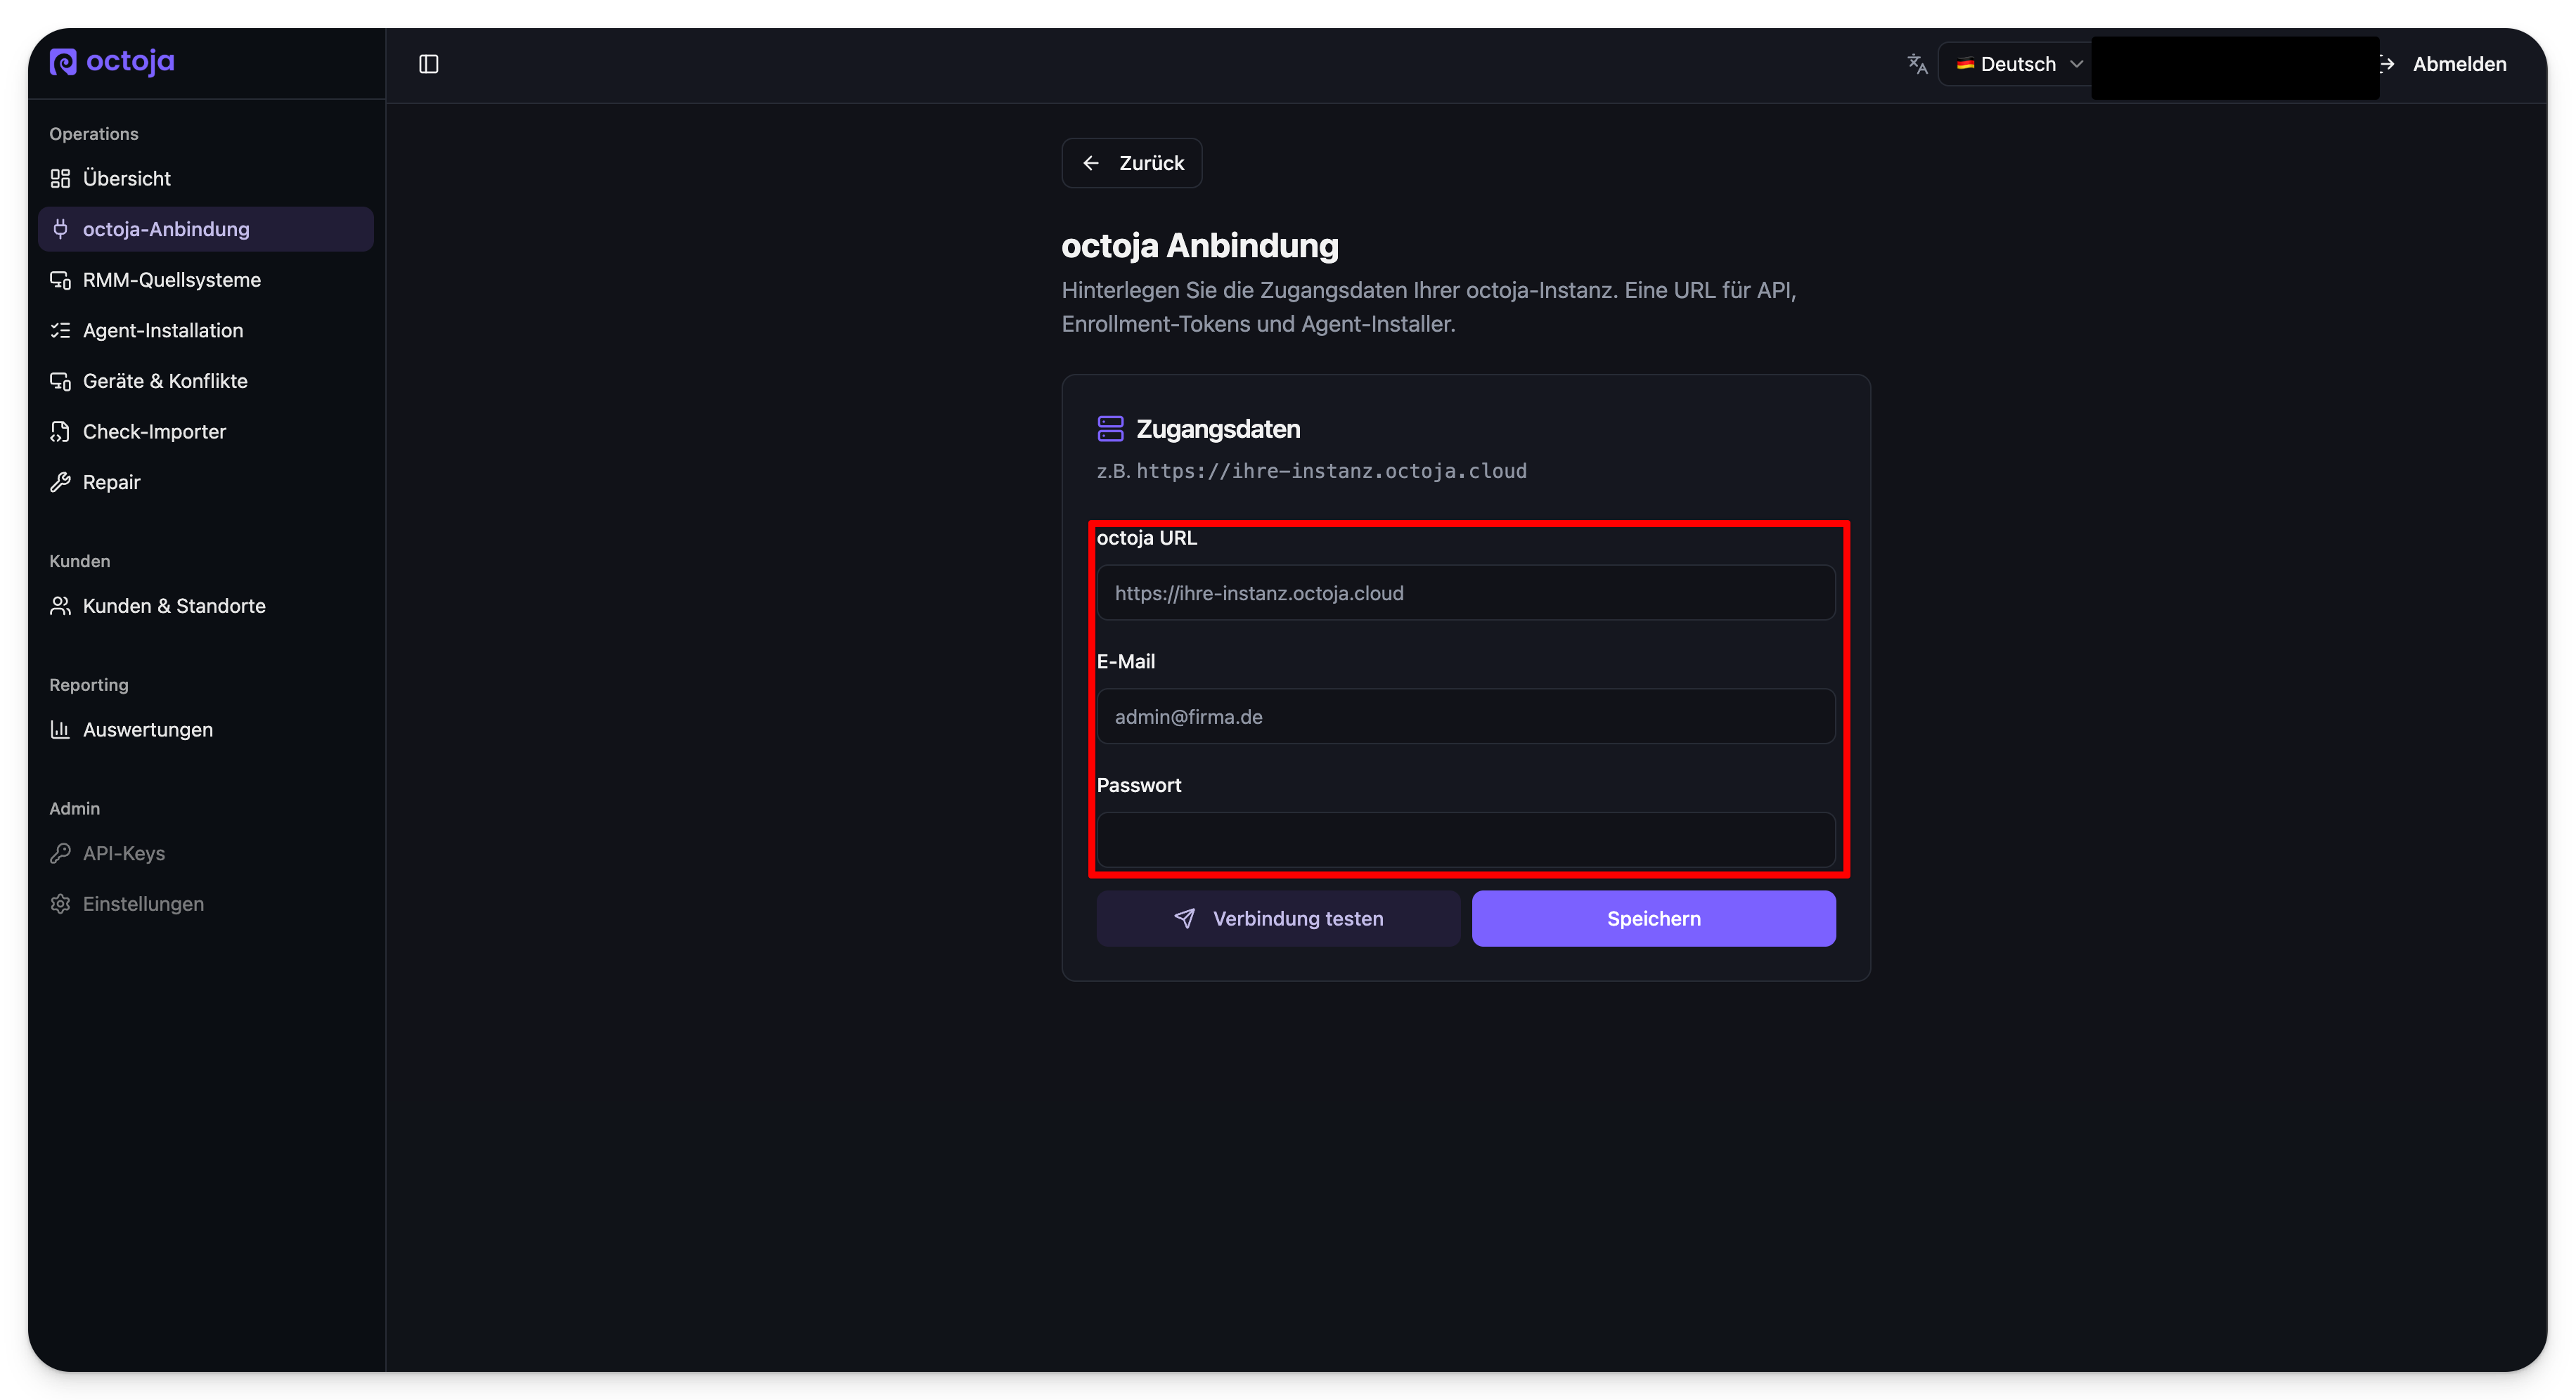
Open octoja Connection and enter the credentials for your octoja instance — this is the single URL octoja uses for its API, for enrollment tokens and for the agent installer.
- Enter your octoja URL, for example
https://your-instance.octoja.cloud. - Enter the e-mail and password of an octoja administrator.
- Select Test connection to confirm the details, then Save.
Step 2: Connect your source RMM
Open Source RMM systems and choose the RMM you want to migrate from. Each tile lists the credentials it needs; select Set up to enter them.
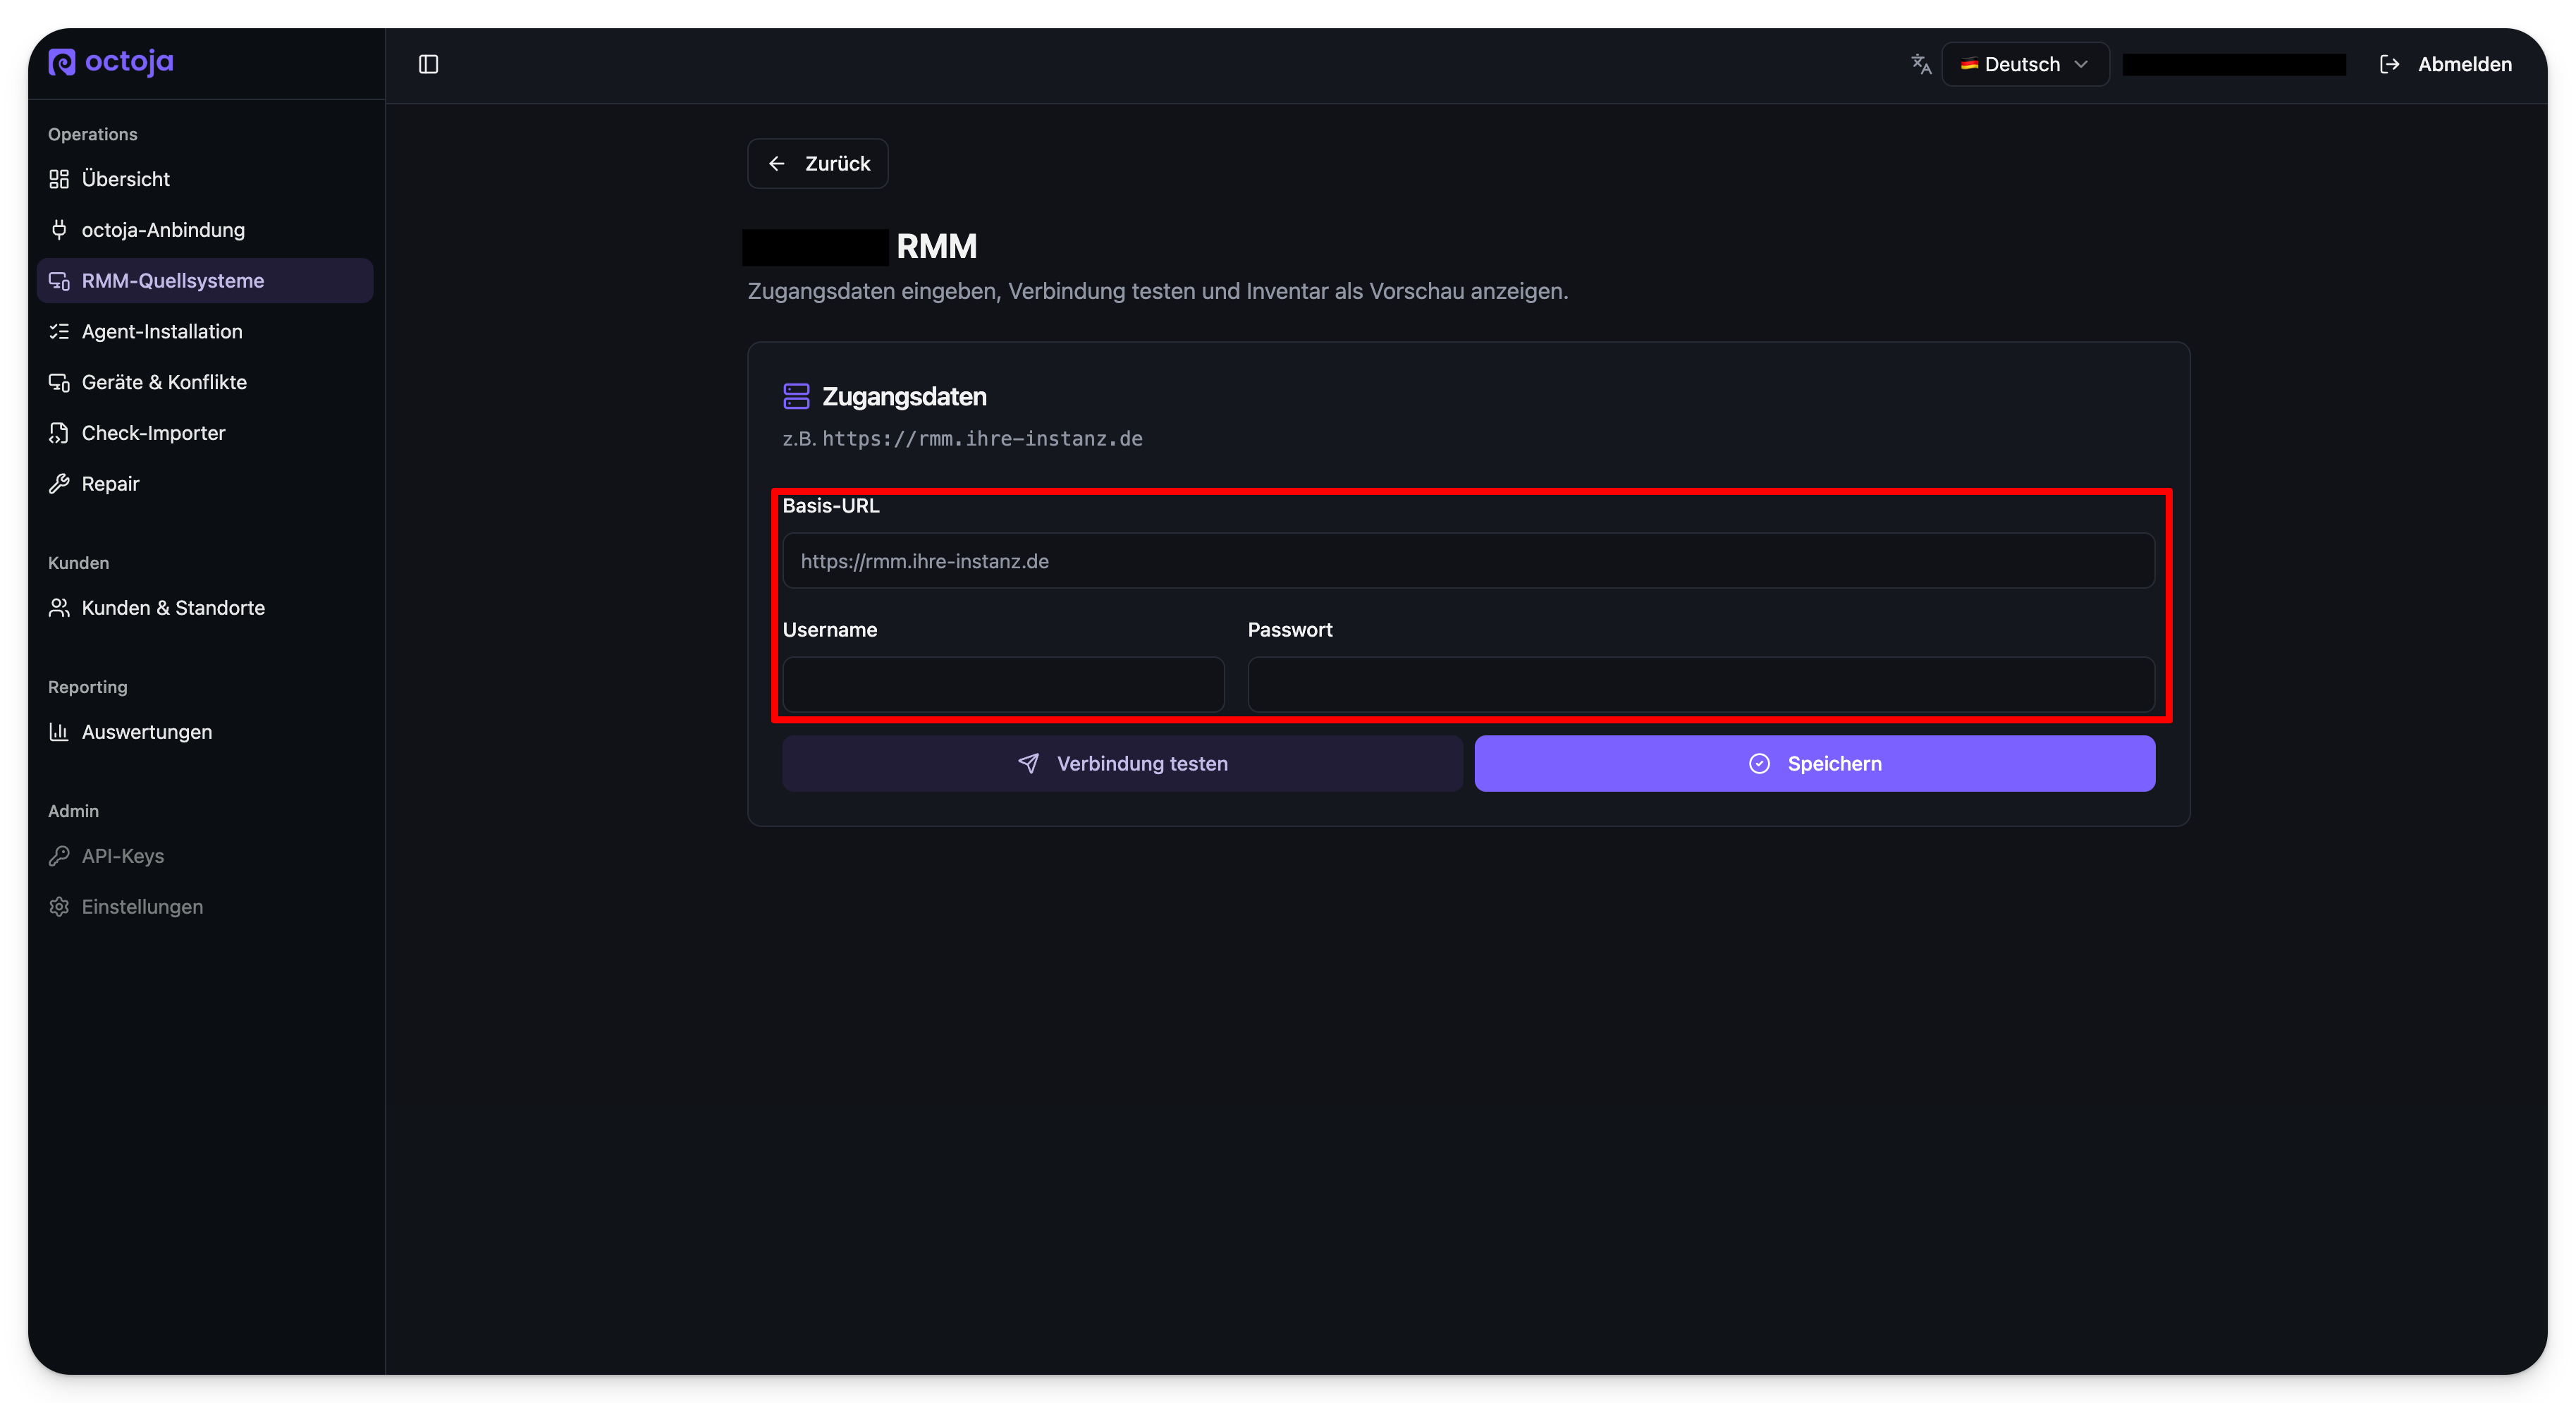
- Enter the connection details for your RMM — for example its base URL, username and password. The exact fields depend on the RMM you picked, and each tile shows what it needs.
- Select Test connection. octoja validates the credentials and can preview the inventory it finds.
- Select Save.
Step 3: Mirror your customers
Open Customers & Sites. octoja lists the customers it found in your source RMM. Customers that already exist in octoja under the same name are linked automatically and marked already mapped; the rest are marked new.
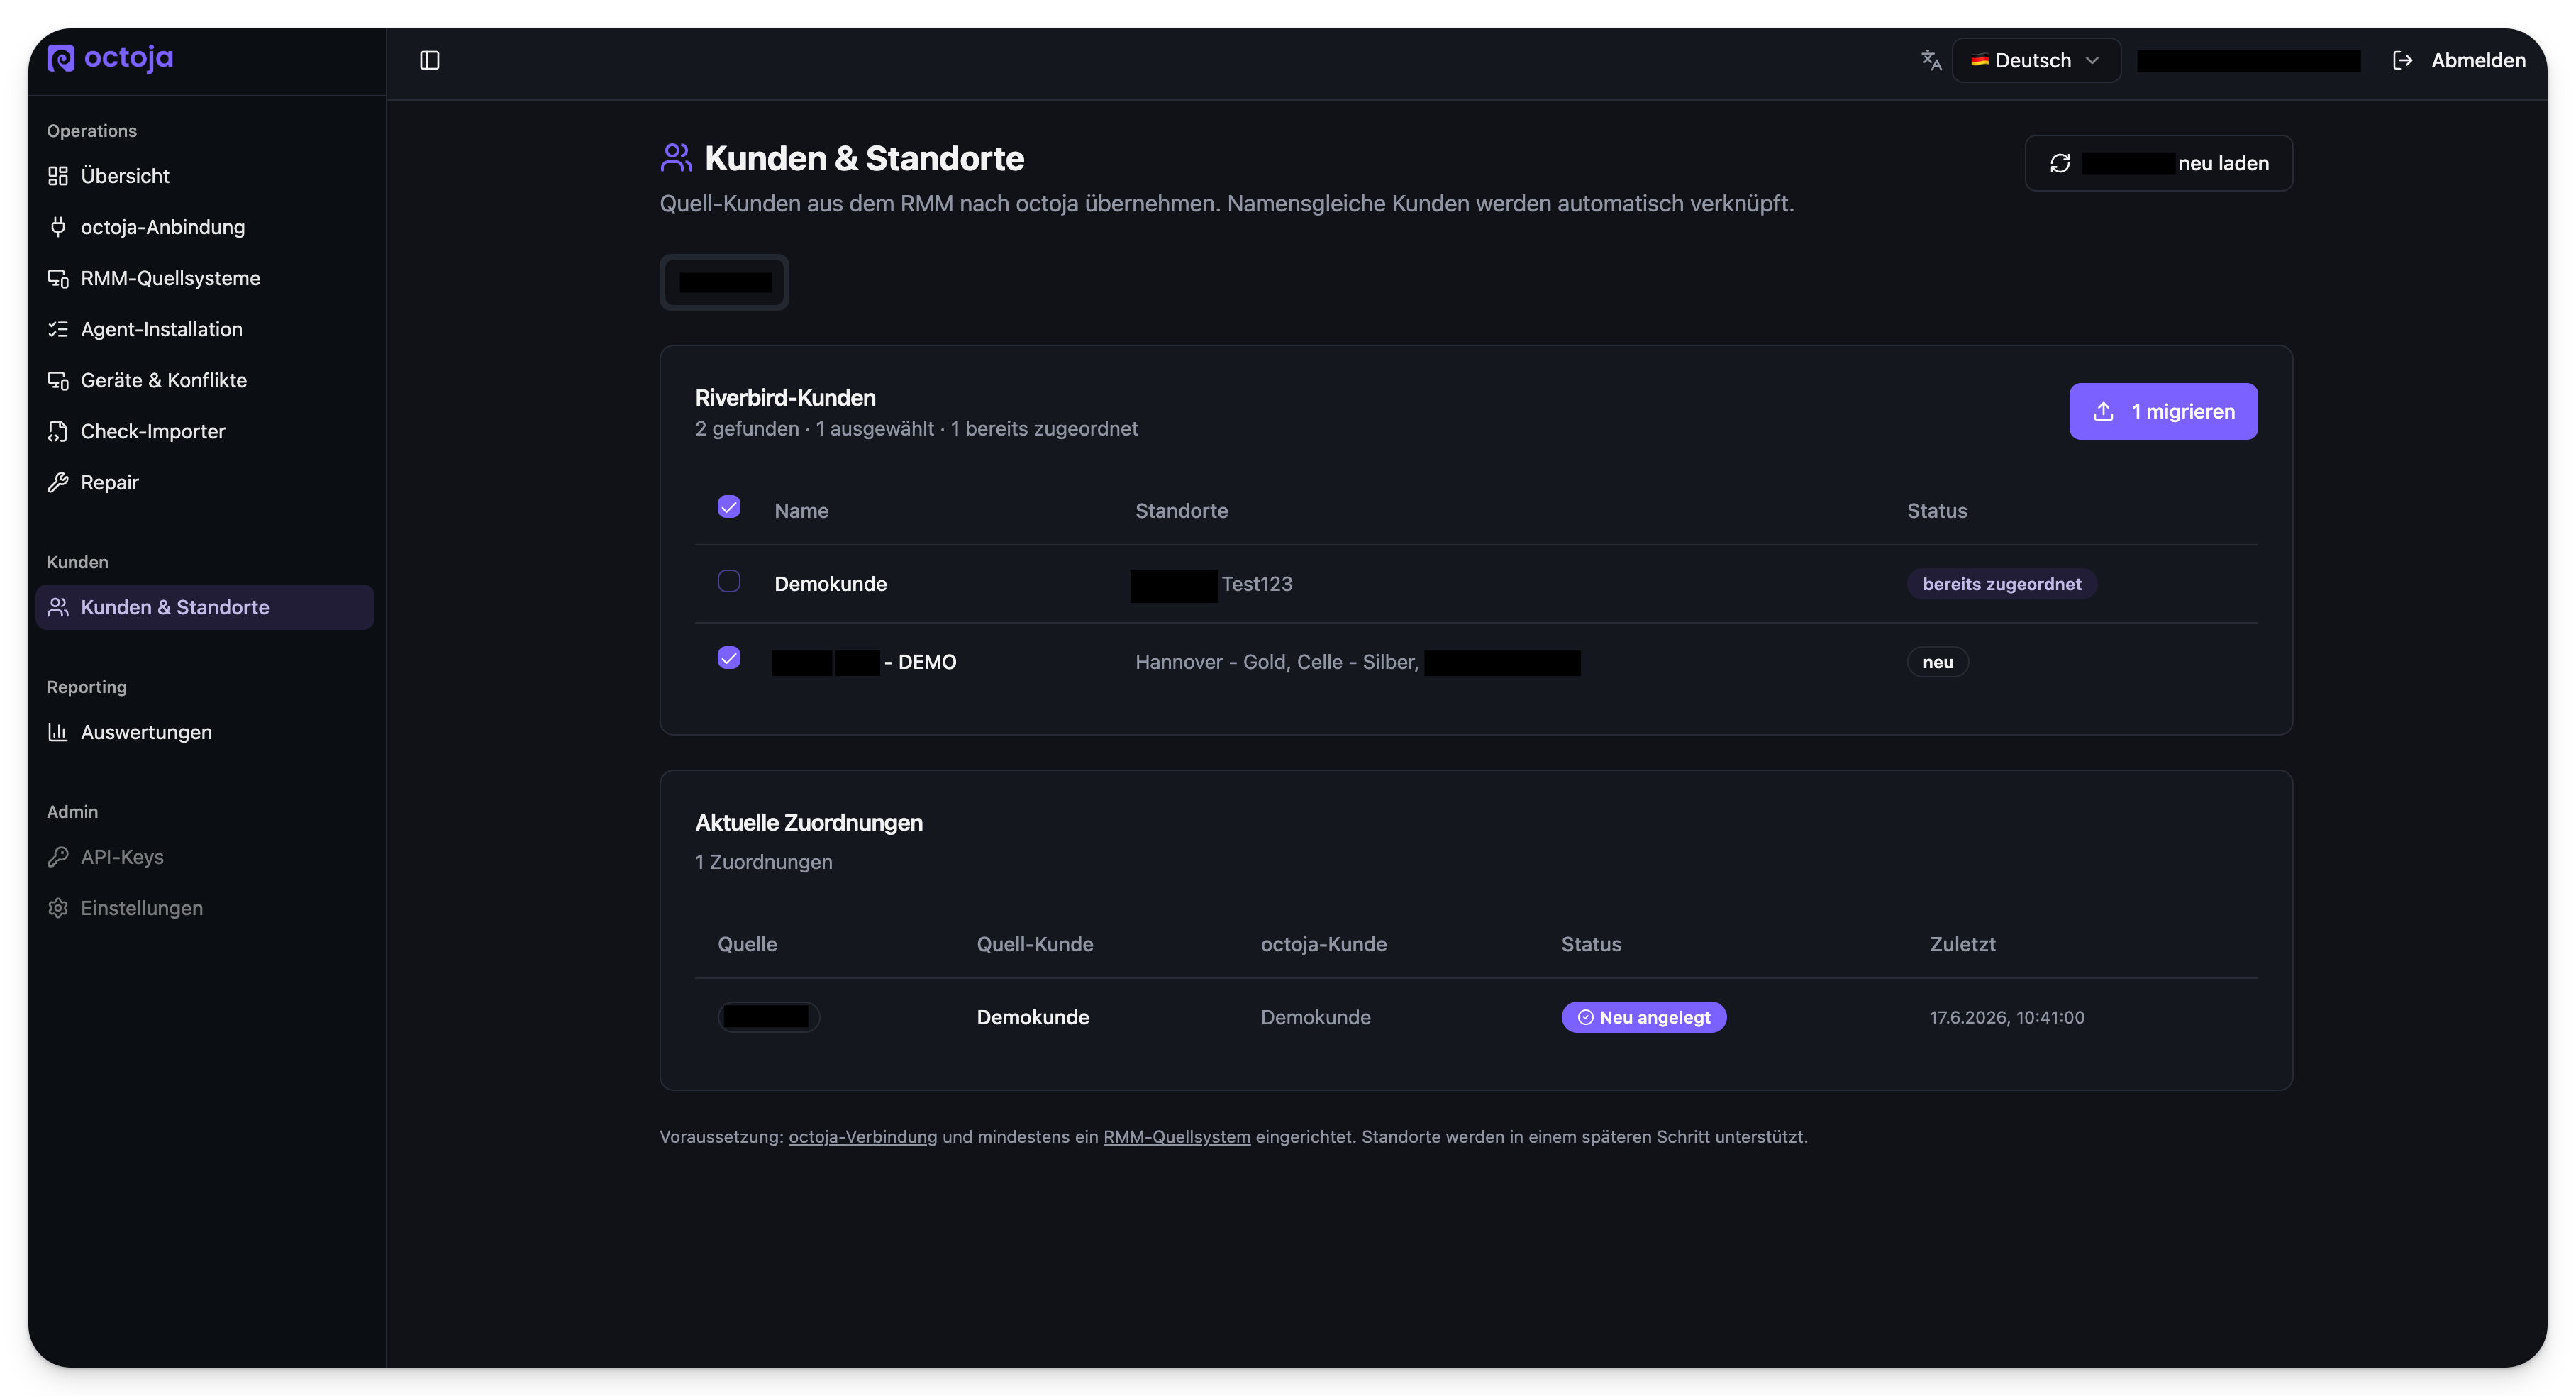
- Tick the customers you want to bring into octoja. You can leave already-mapped customers unticked.
- Select Migrate — the button shows how many are selected, for example Migrate 1.
- Each migrated customer appears under Current mappings, showing the source, the source customer, the matching octoja customer and a status such as Newly created.
Site mapping is handled later, as each device enrolls, so you don't need to assign sites by hand here.
Step 4: Generate the agent installer command
Open Agent Installation. octoja shows one universal installer command per partner, with your partner API key already embedded. When the command runs, the server resolves each device's hostname and MAC to the right octoja customer and issues an enrollment token.
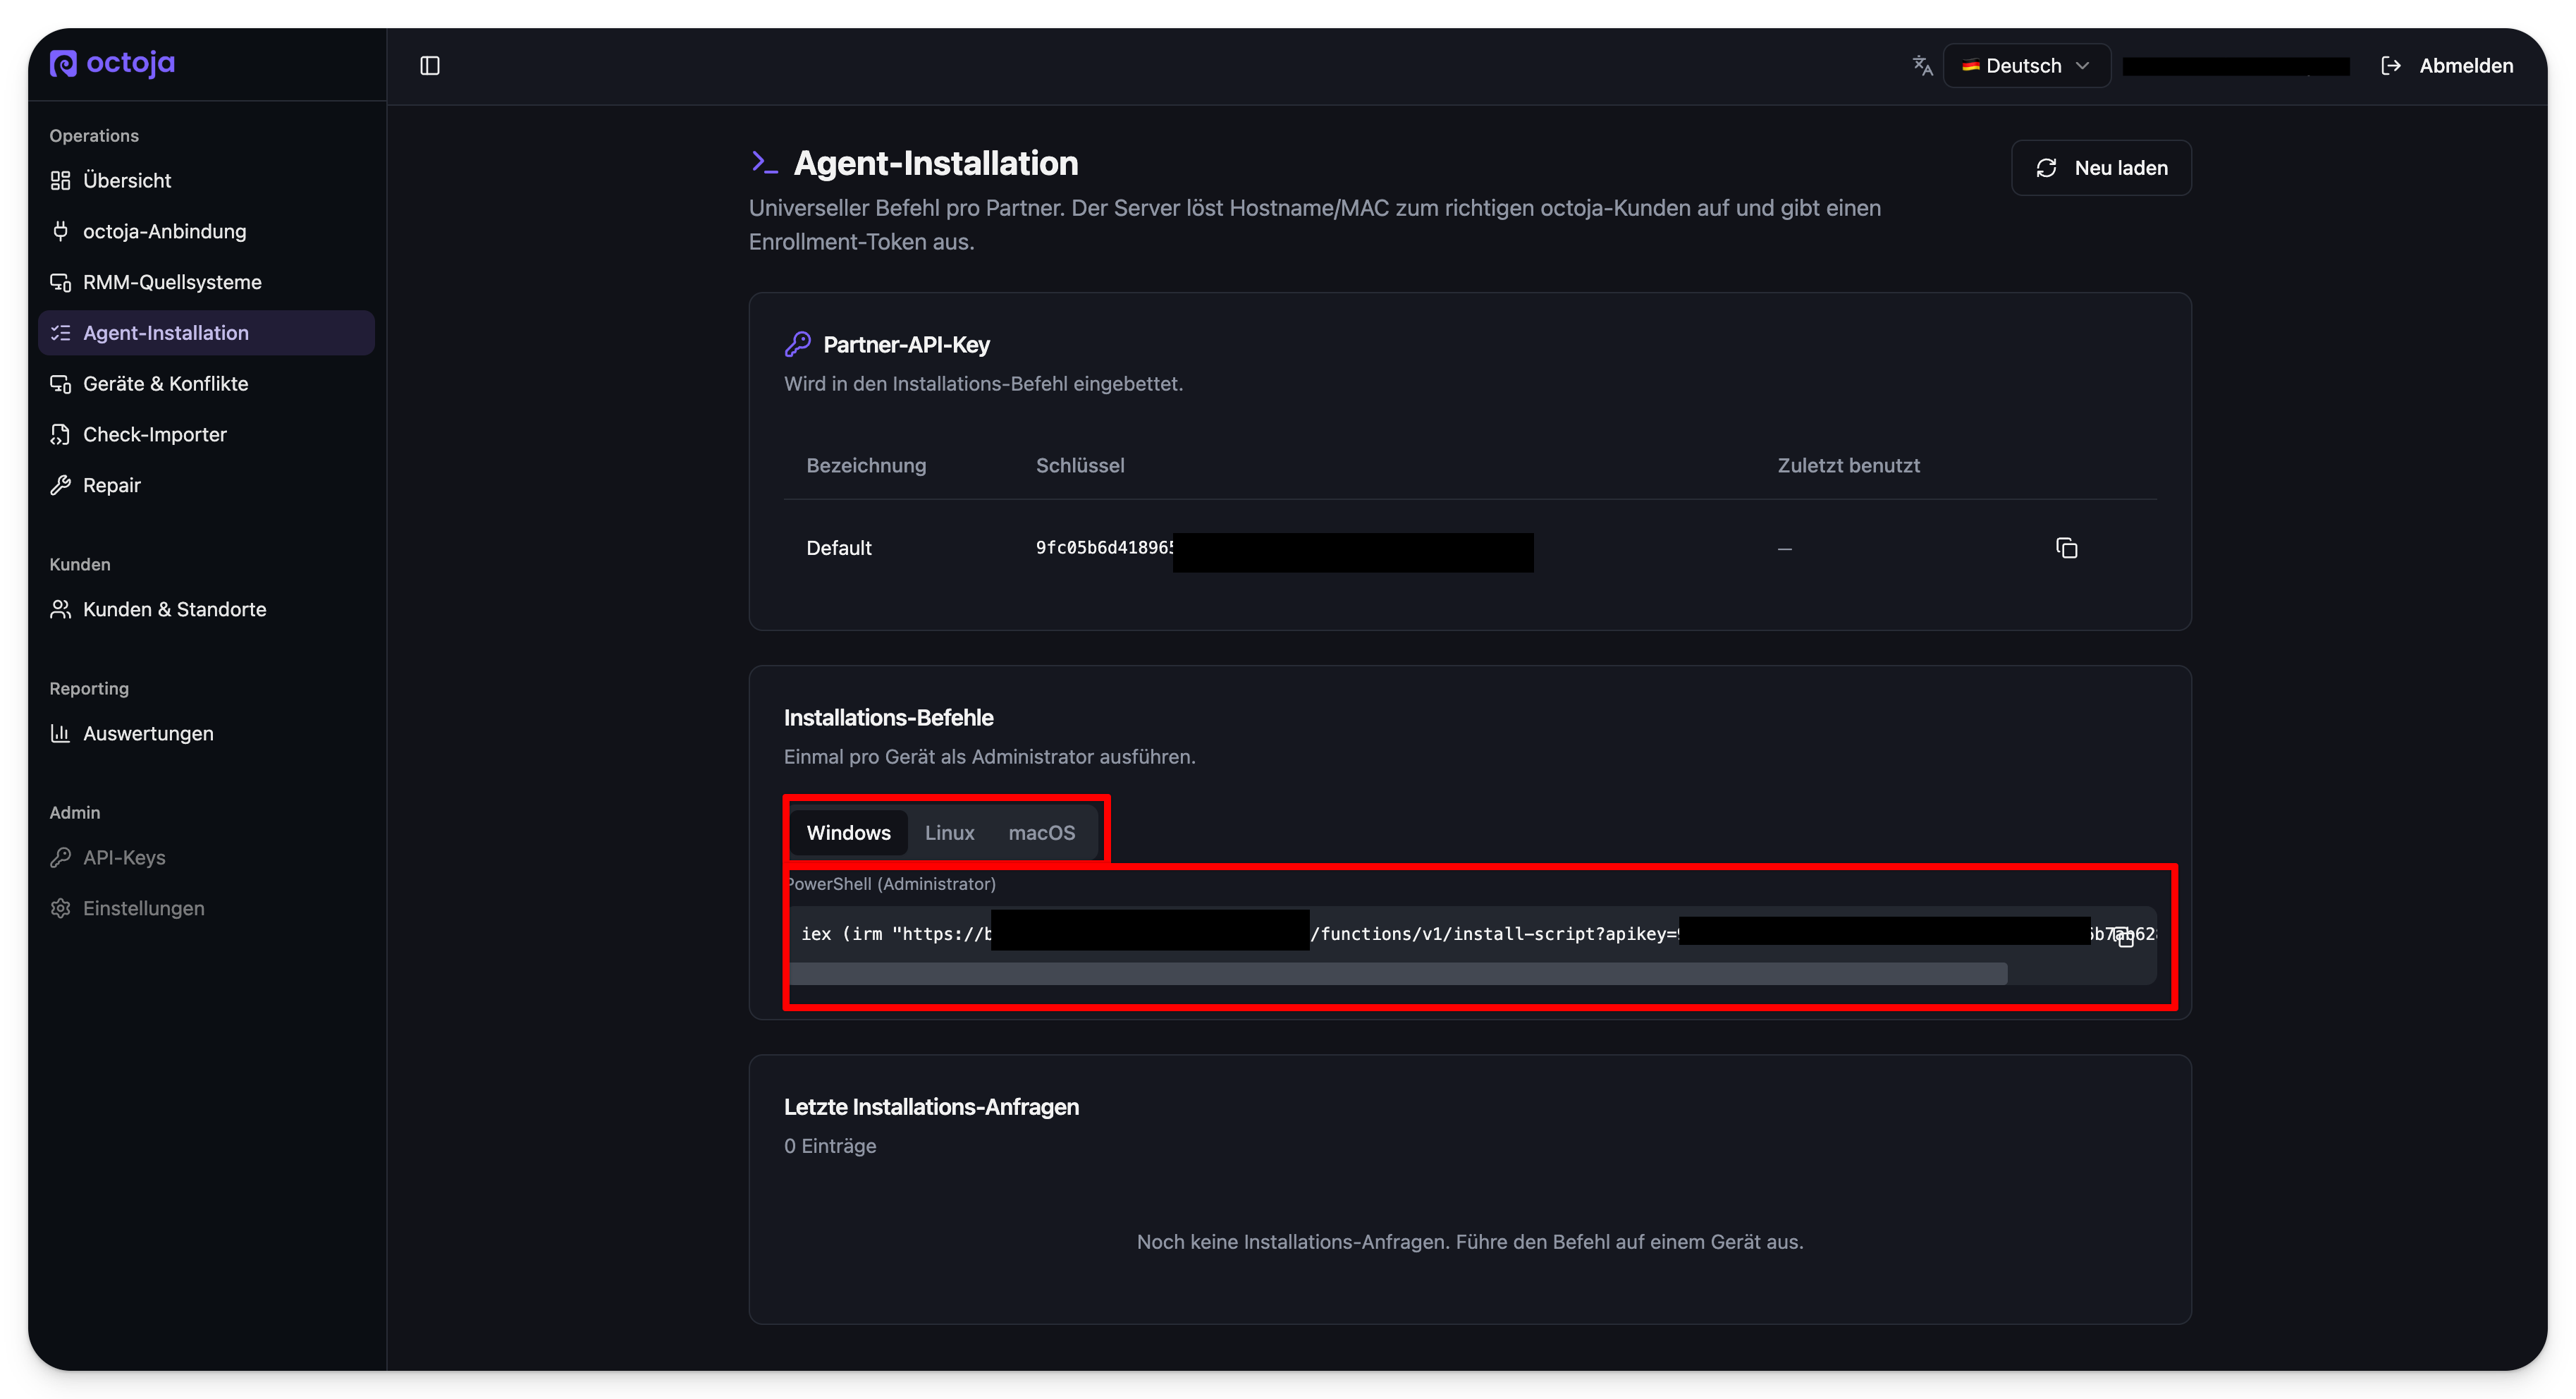
- Choose the platform tab — Windows, Linux or macOS.
- Copy the command shown. The Windows command runs in PowerShell as an administrator; Linux and macOS use bash.
- The command is meant to be run once per device, with administrator rights.
Step 5: Roll out the agent to your devices
Distribute the copied command to your devices through your existing RMM's scripting feature — the same way you push any script to your fleet. Running it once per device installs the octoja agent and enrolls the device automatically; there is nothing to type on each machine.
You can also run the command by hand on a single device first, to test the rollout before sending it to everyone.
Step 6: Monitor the rollout
Open Device Migration to watch the rollout live. The page lists every device from your source RMM with its migration status and refreshes on its own as devices come in.
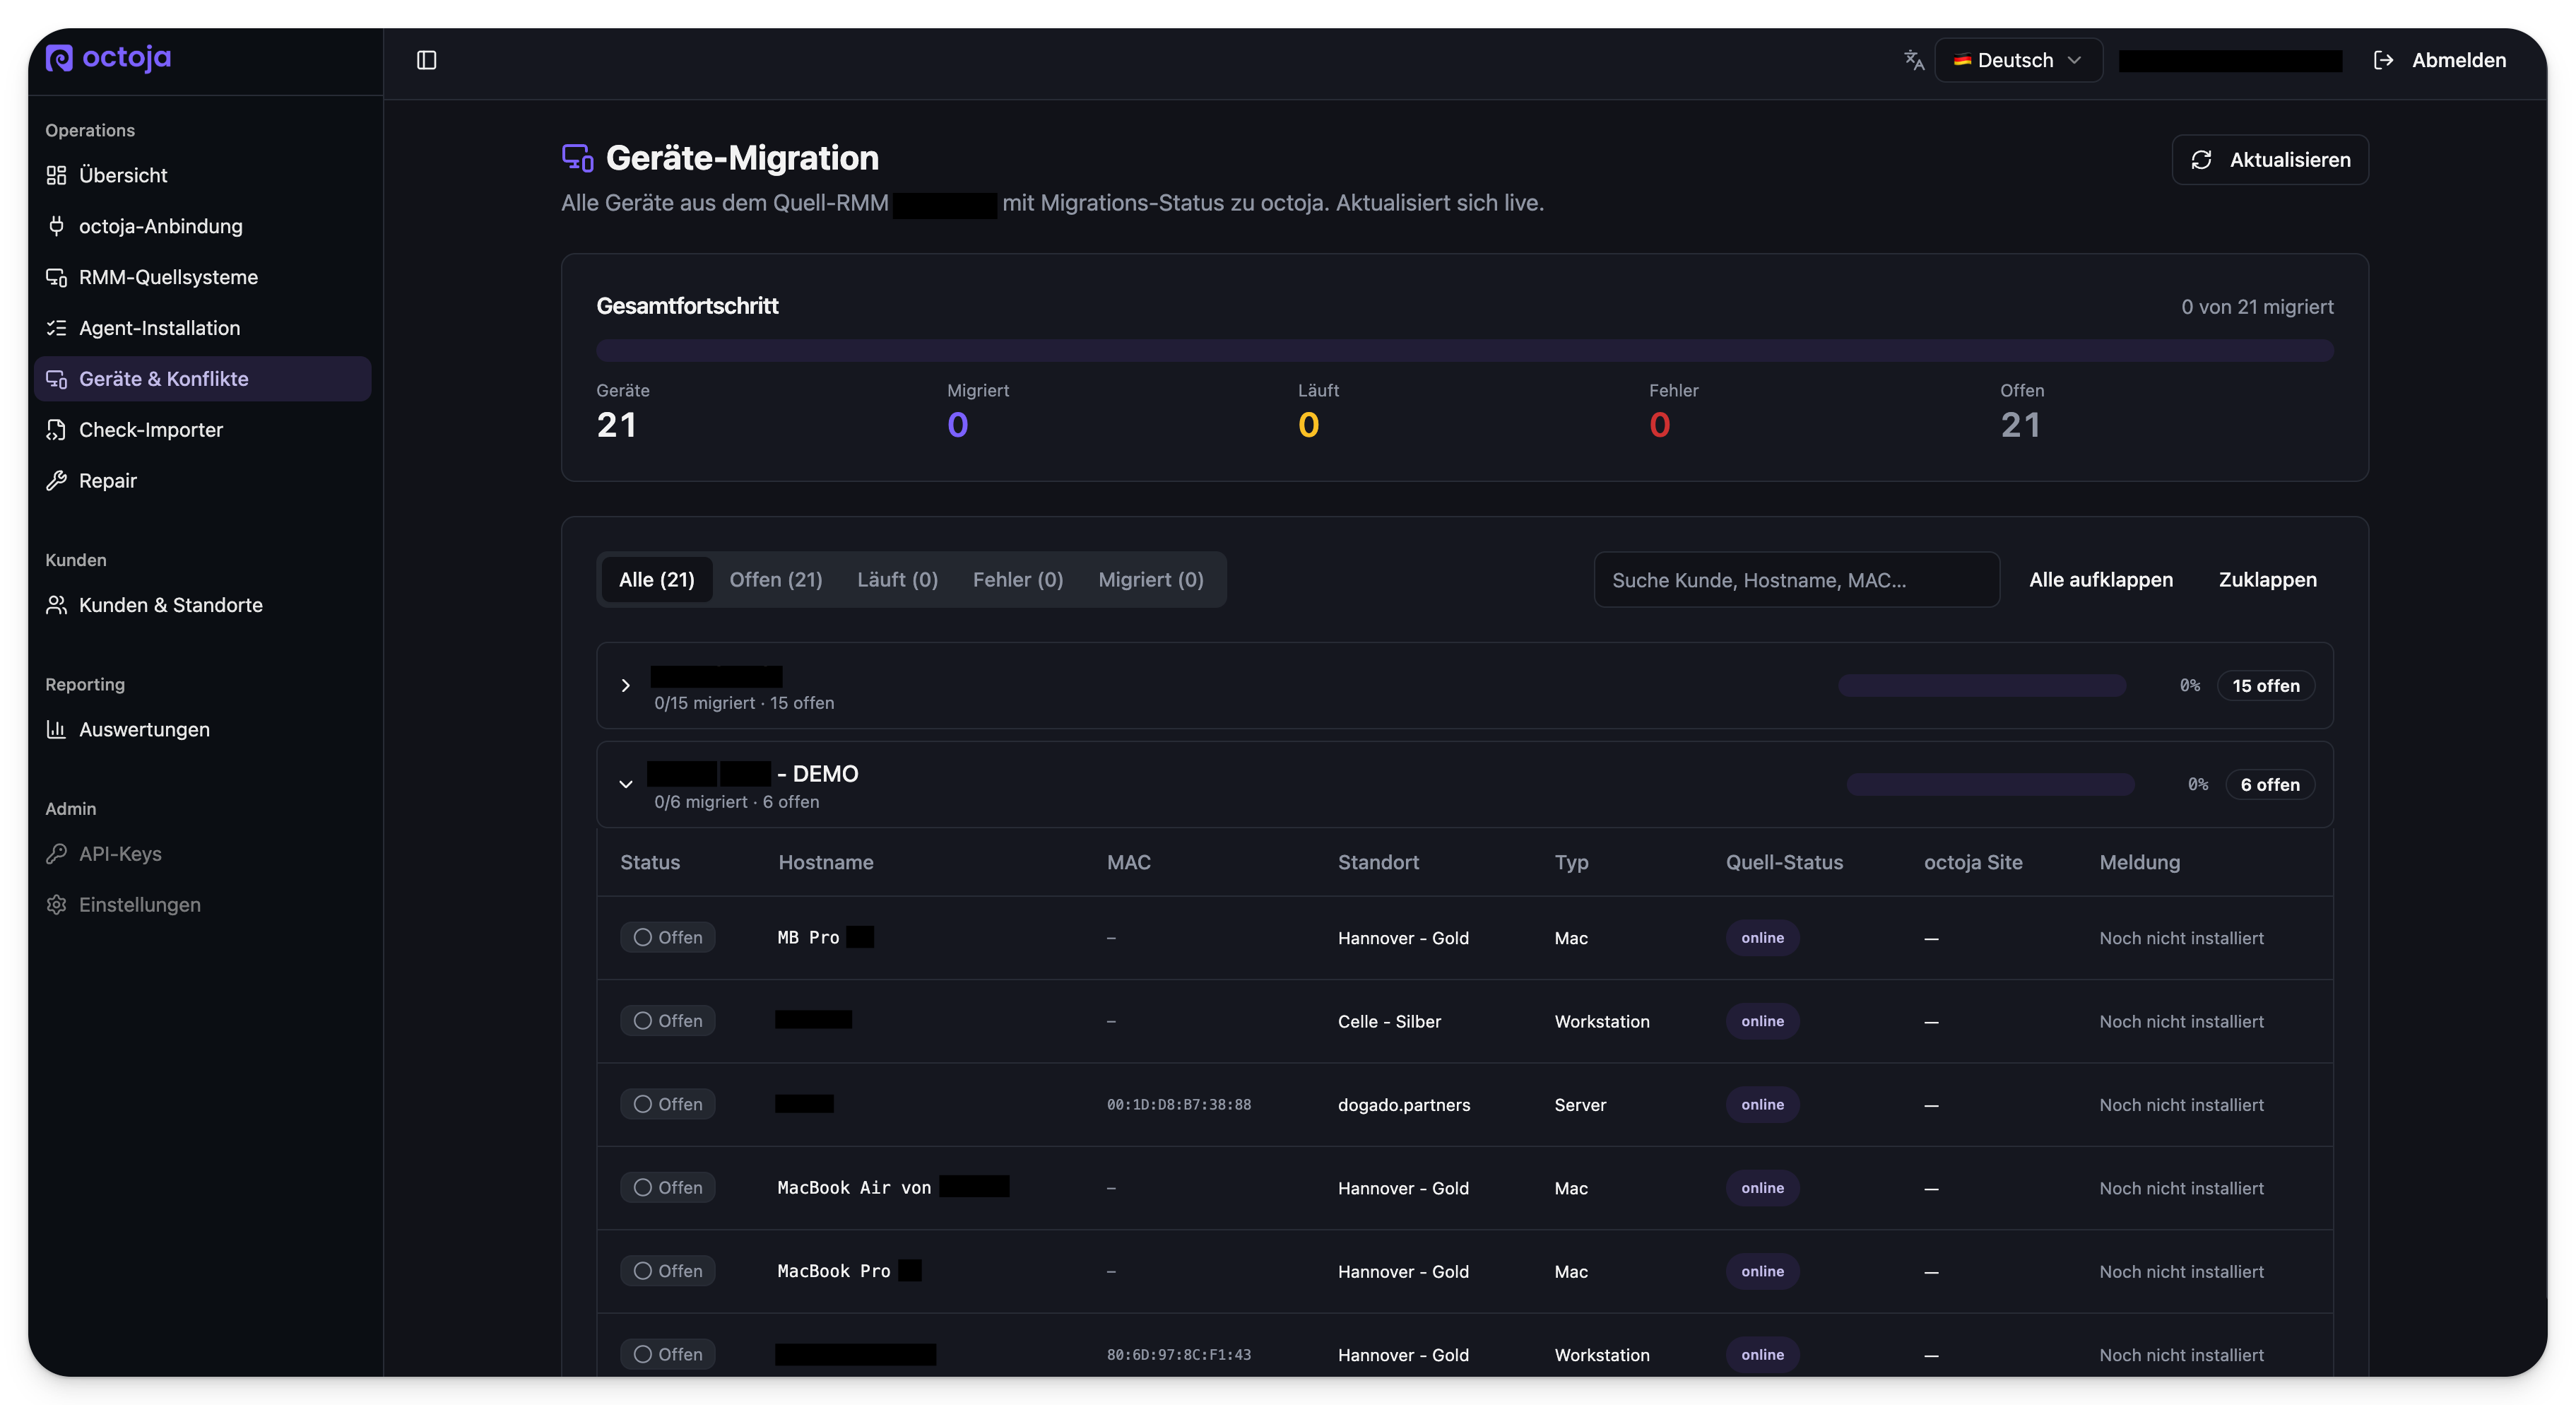
At the top, Overall progress summarises the fleet with counters for total Devices, Migrated, Running, Error and Open. Below, devices are grouped per customer, each group with its own progress bar.
Use the status tabs (All, Open, Running, Error, Migrated) or the search box to focus on a subset. The Open filter is the quickest way to see which devices still need the installer.
Tips
- Start with one customer and a single test device to confirm the command and the automatic resolution work, before rolling out to the whole fleet.
- The Open filter on Device Migration is your to-do list — anything still listed there hasn't run the installer yet.
- To carry your monitoring across as well, you can translate PowerShell checks from your old RMM into octoja Custom Checks with the Check Importer — see the separate Check Importer guide.