Deploy Agent on Linux
Step-by-step guide to installing and deploying the octoja agent on Linux.
Written By Erdinc Akay
Last updated About 1 month ago
Prerequisites
- An octoja account with the Agent Management permission — without it, Administration → Agent Deployment does not appear in your navigation
- Ubuntu 22.04 LTS or 24.04 LTS, or Debian 12 or 13 (x64 or arm64)
- Root or sudo access
- Internet access (outbound HTTPS on port 443)
Key terms
This guide uses some Linux commands. Here is what they mean:
Steps
- In octoja, navigate to Administration → Agent Deployment.
- In Step 1 – Settings, choose the enrollment mode. Select Open Deployment to let any device register, or Token-based Deployment to require an enrollment token. The generated install command on Step 4 changes based on this choice.
- In Step 2 – Choose Platform, click Linux.
- In Step 3 – Choose Installation Method, select Quick Install for a single device or Manual Install if you need a custom package.
- In Step 4 – Install, copy the command from the panel and run it on the Linux device (see below).
- In Step 5 – Verification, confirm the new device shows up. You can also navigate to Devices. The device should appear within 1–2 minutes.
Quick install (recommended)
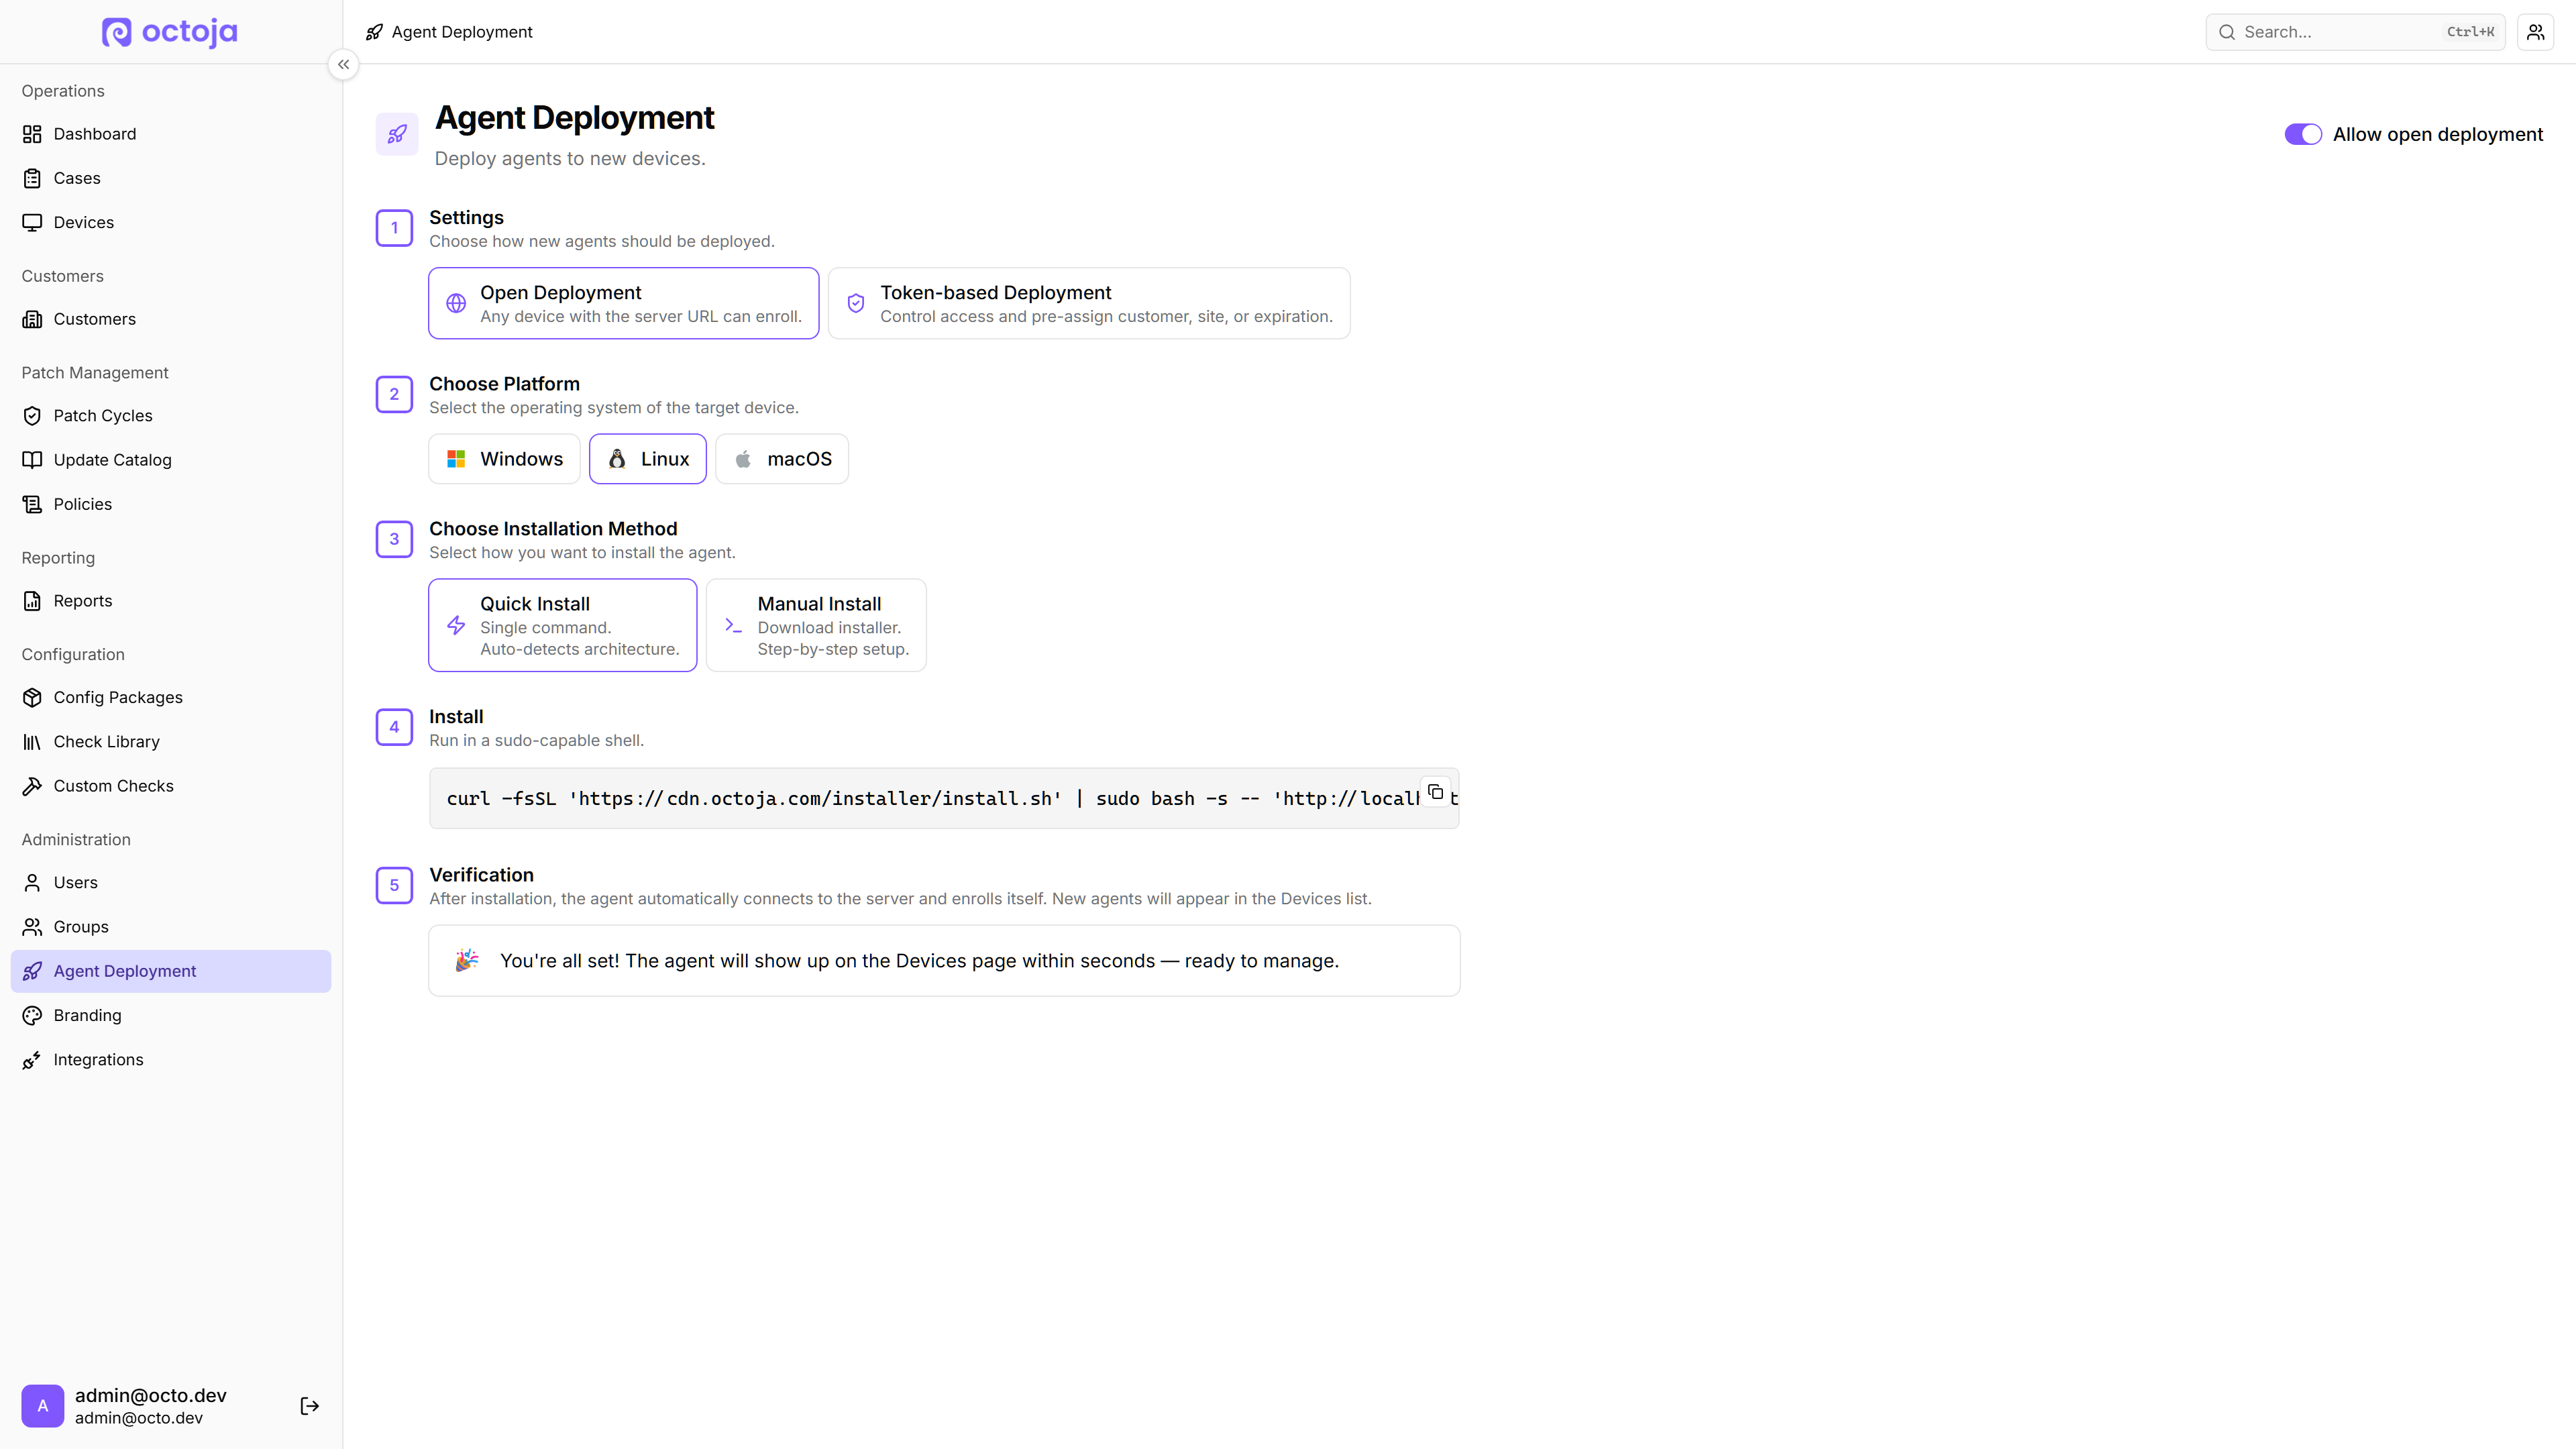
Copy the quick install command from the deployment page. It looks something like this:
curl -fsSL 'https://cdn.octoja.com/installer/install.sh' | sudo bash -s -- 'https://YOUR-OCTOJA-URL'If token-based deployment is enabled, the command includes the token as a second positional argument:
curl -fsSL 'https://cdn.octoja.com/installer/install.sh' | sudo bash -s -- 'https://YOUR-OCTOJA-URL' 'YOUR-TOKEN'Copy the command directly from octoja. It already contains the server URL (and the token if applicable). The example above will not work without modification.
The script detects the architecture, downloads the matching package, installs it, and starts the octoja-launcher and octoja-agent services.
Manual install
On the deployment page, select Manual Install to download the agent ZIP archive directly. Extract it, then from inside the extracted directory, run the bundled install.sh with your server URL:
sudo bash install.sh https://YOUR-OCTOJA-URLIf a token is required, pass it as the second argument:
sudo bash install.sh https://YOUR-OCTOJA-URL YOUR-TOKENThe script installs the .deb package, which places the agent under /opt/octoja and starts the octoja-launcher and octoja-agent services.
How the sidecar settings file works
When you run install.sh with a server URL (and optional token), it writes those values to a settings file at /etc/octoja/installer.settings.json. The package's post-install step then reads that file to configure the agent — it does not read the command-line arguments directly.
If the sidecar file is missing when the package is installed, the post-install step prints a note asking you to edit launcherconfig.xml manually. You can also pre-create the sidecar file yourself before installing the package, for example when staging an image:
sudo mkdir -p /etc/octojasudo tee /etc/octoja/installer.settings.json <<'EOF'{ "octojaUrl": "https://YOUR-OCTOJA-URL", "token": "YOUR-TOKEN"}EOFCheck agent status
The octoja agent runs as two systemd services — background programs that start automatically at system boot:
- octoja-launcher — manages updates and supervises the agent process.
- octoja-agent — the actual agent that connects to your octoja server.
Check the status of both with the following commands:
systemctl status octoja-launchersystemctl status octoja-agentBoth should show active (running). If either shows inactive or failed, restart it:
sudo systemctl restart octoja-launchersudo systemctl restart octoja-agentManage the agent services
Need an enrollment token? See Configure Agent Enrollment Tokens.