Configure Branding
Apply your logo and colours to the octoja web interface
Written By Erdinc Akay
Last updated 25 days ago
Platform branding replaces the octoja logo and colours with your own, so customers see your brand when they log in.
Prerequisites
- You need the Branding Management permission (
branding.manage). It is granted via groups in Administration → Groups — without it, the Branding page does not appear. See Assign Permissions.
Steps
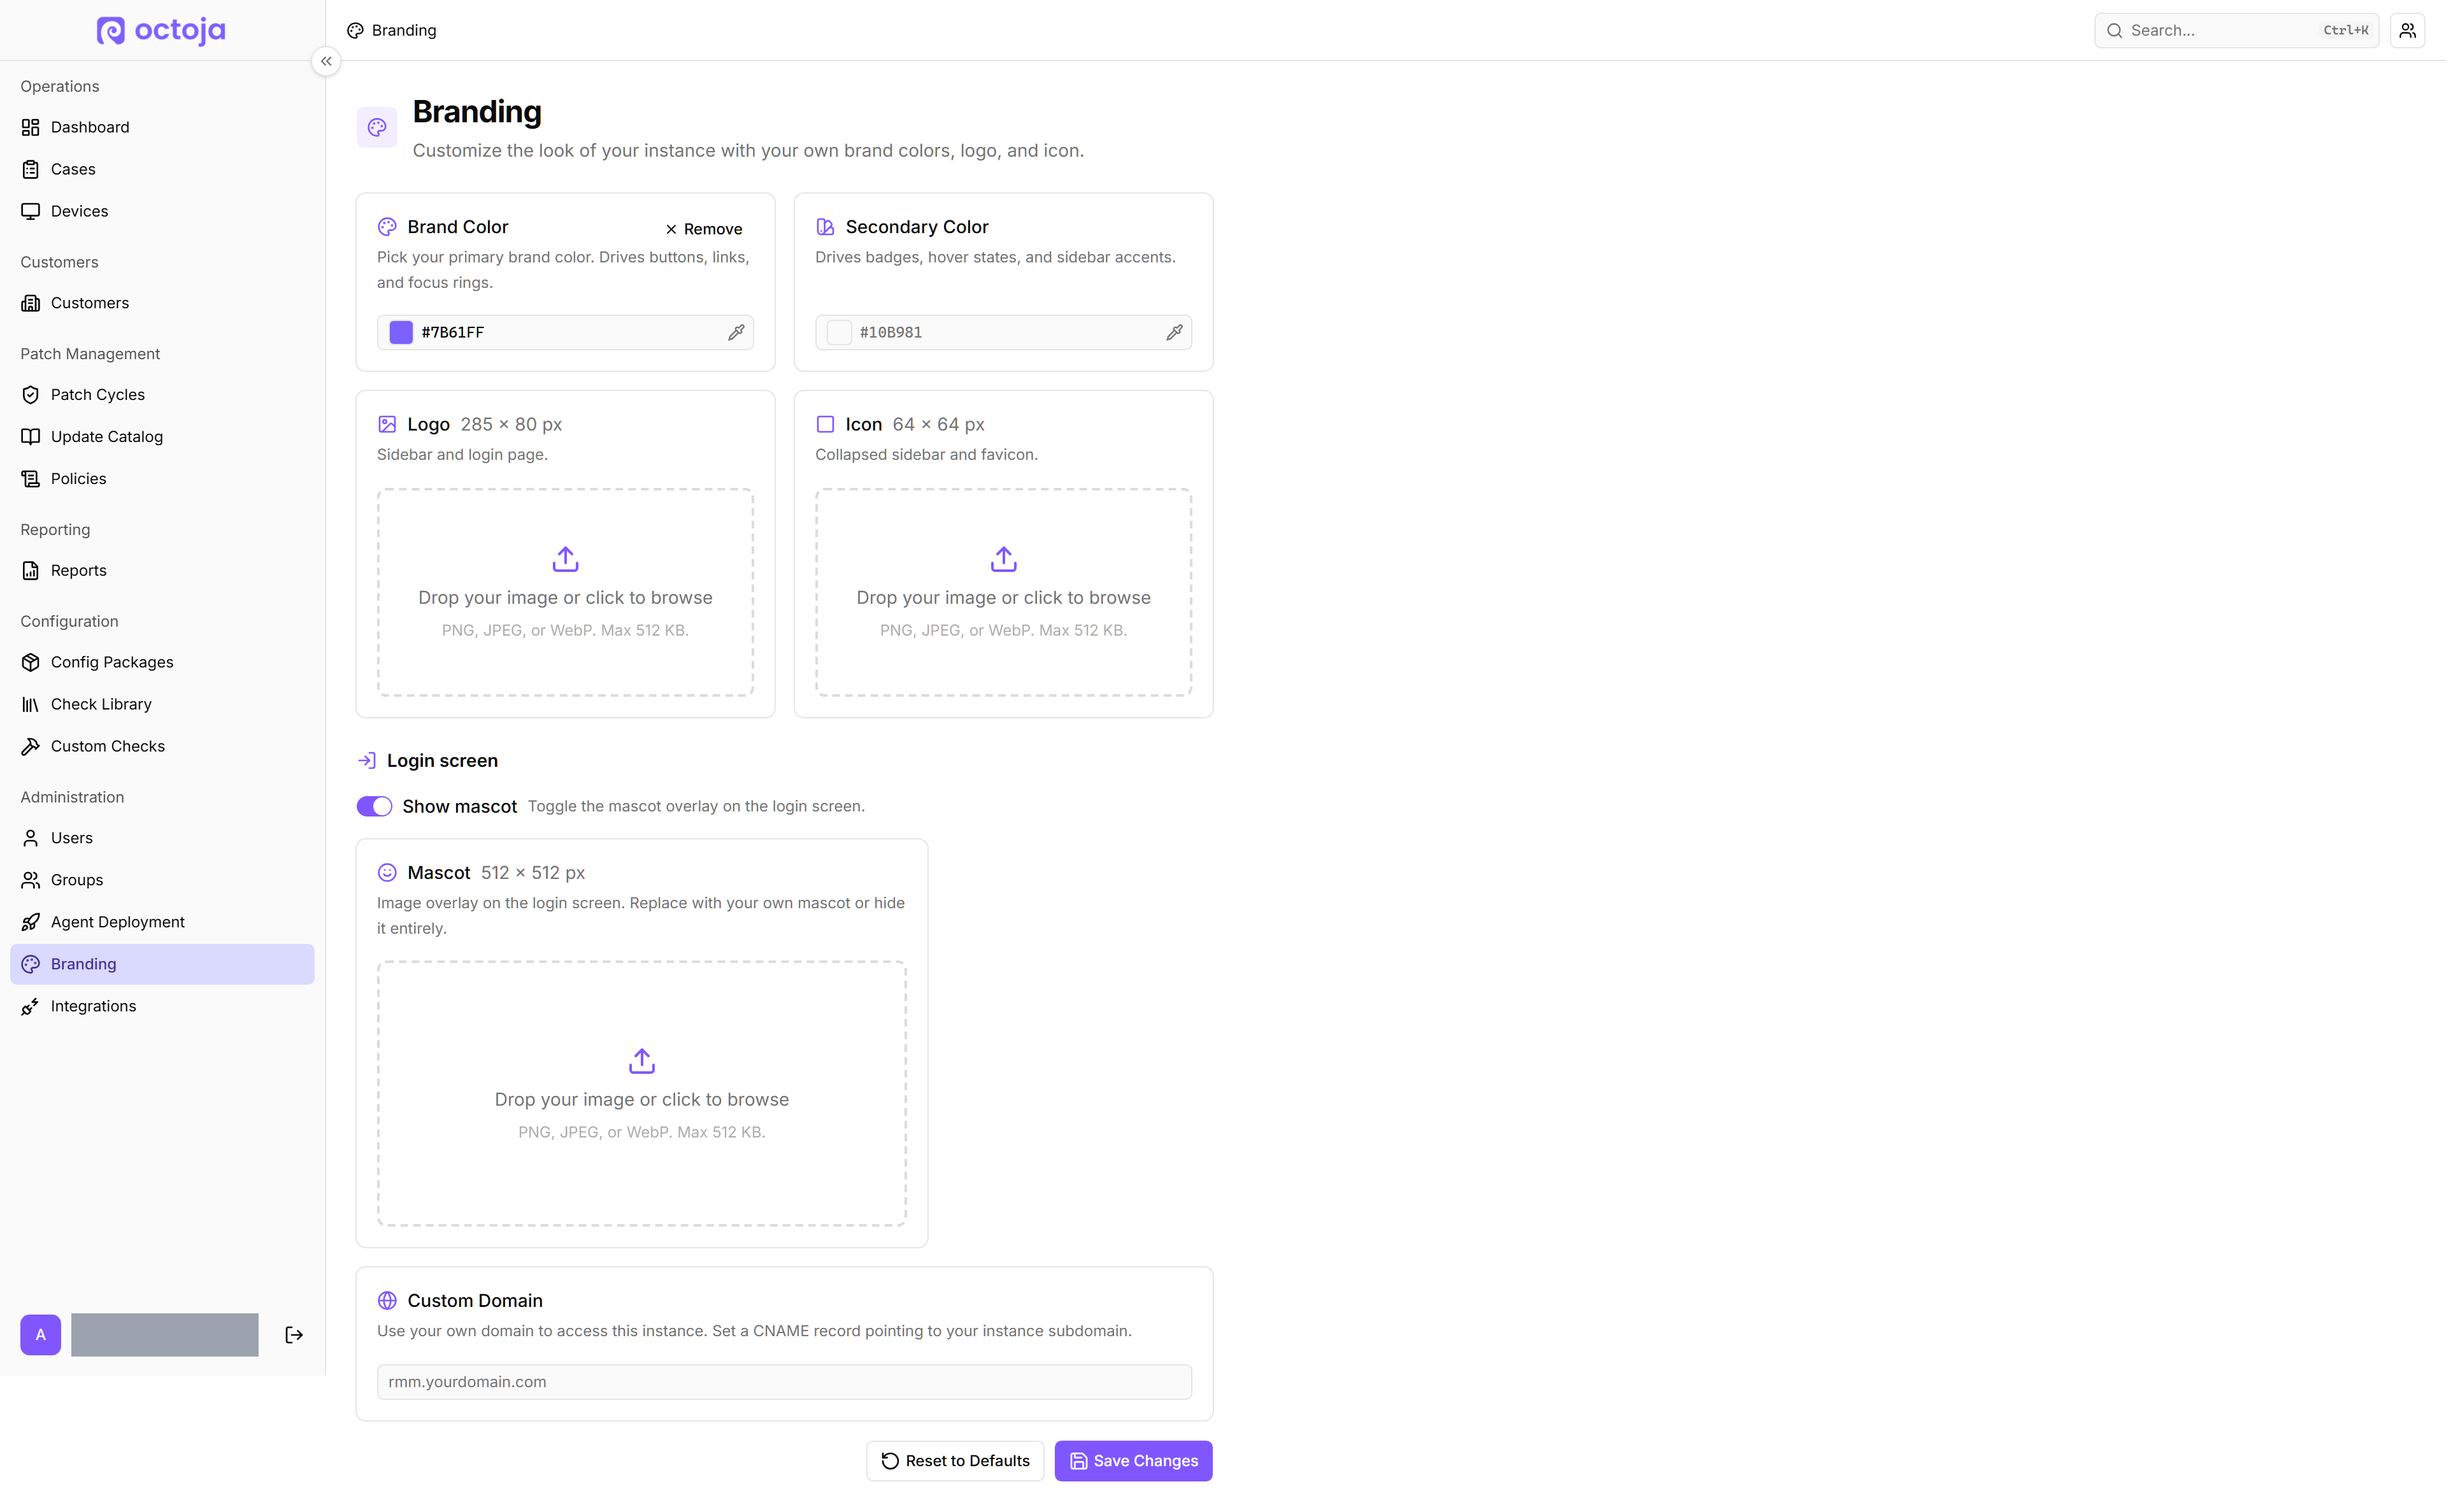
- Go to Administration → Branding.
- Optionally set a Window Title (max. 60 characters) — it is shown in the browser tab and window title in place of "octoja".
- Optionally set a Product Name — it is shown in the self-service desktop app's title bar, window caption, and tray tooltip. Leave it empty to use the default.
- Upload your logo (PNG, JPEG, or WebP, max 512 KB, recommended 285 × 80 px).
- Upload an icon (PNG, JPEG, or WebP, recommended 64 × 64 px, max 512 KB) — shown in the collapsed sidebar and as the browser-tab favicon.
- Optionally upload a mascot image (PNG, JPEG, or WebP, recommended 512 × 512 px, max 512 KB) and toggle Show mascot to display it on the sign-in screen.
- Set your Brand Color (hex code, e.g. #7B61FF).
- Set your Secondary Color (hex code, e.g. #10B981).
- Optionally set a custom domain (e.g. rmm.yourdomain.com) — see below.
- Click Save Changes: the page reloads with your new branding applied immediately. Other users see it the next time they load the page.
- To revert every branding customization back to octoja defaults, click Reset to Defaults and confirm in the dialog. The button only appears once at least one branding value has been customized.
Custom domain setup
By default, your octoja instance is available at a URL like yourcompany.octoja.com. If you want users to access it at your own address (e.g. rmm.yourdomain.com), you need to create a CNAME record with your DNS provider that points your domain to octoja.
Steps to set up a custom domain
- In octoja, enter your custom domain (e.g.
rmm.yourdomain.com) in the Platform Branding settings. As soon as you type a domain, octoja renders a DNS setup guide directly beneath the field with the exact Type (CNAME), Name, and Target values to copy into your DNS provider. - Click Save Changes to persist the custom domain. The Check button next to the domain field only appears once the domain has been saved.
- At your DNS provider, create the CNAME record using the Type / Name / Target values shown in the in-product guide. See your DNS provider's documentation for how to add a CNAME record. Changes usually take effect within a few minutes, but can take up to 24 hours.
- Back in octoja, click Check next to the custom-domain field to verify that your DNS record is reachable.
- Test by opening
rmm.yourdomain.comin a browser — you should see your branded octoja login page.
Tip: If you are not sure how to create a DNS record, ask your IT administrator or domain registrar's support team.
What customers see
After branding, your customers see your logo and your colours with your own brand identity. If you also set a Window Title, the browser tab shows your name instead of octoja — only then is the experience fully white-labelled.