Enable Two-Factor Authentication for a User
Set up two-factor authentication on your own octoja account, or enable or remove it as an administrator for another user.
Written By Erdinc Akay
Last updated 26 days ago
Two-factor authentication (2FA) adds a second layer of security to an octoja account — after entering a password, the user also needs a code from an authenticator app on their phone. octoja supports two paths: every user can set up 2FA on their own account, and administrators can enable 2FA for someone else, or remove an existing 2FA setup so the user can enroll again with a new device.
What you need
- An authenticator app on your phone (Google Authenticator, Microsoft Authenticator, or Authy)
What is an authenticator app? A free phone app that generates a new 6-digit code every 30 seconds. Install any TOTP authenticator from your device's app store if you don't already have one.
Set up 2FA on your own account
This is the self-service path. Any user can secure their own account from their profile page.
- Click your name at the bottom of the left sidebar to open your profile.
- Scroll to the Authentication section.
- Click Enable 2FA.
- Scan the QR code (or enter the Manual entry key) with any TOTP authenticator app — Google Authenticator, Microsoft Authenticator, 1Password, Authy, and so on.
- Enter the 6-digit code from your app.
- Click Verify & Enable. 2FA is now active on your account.
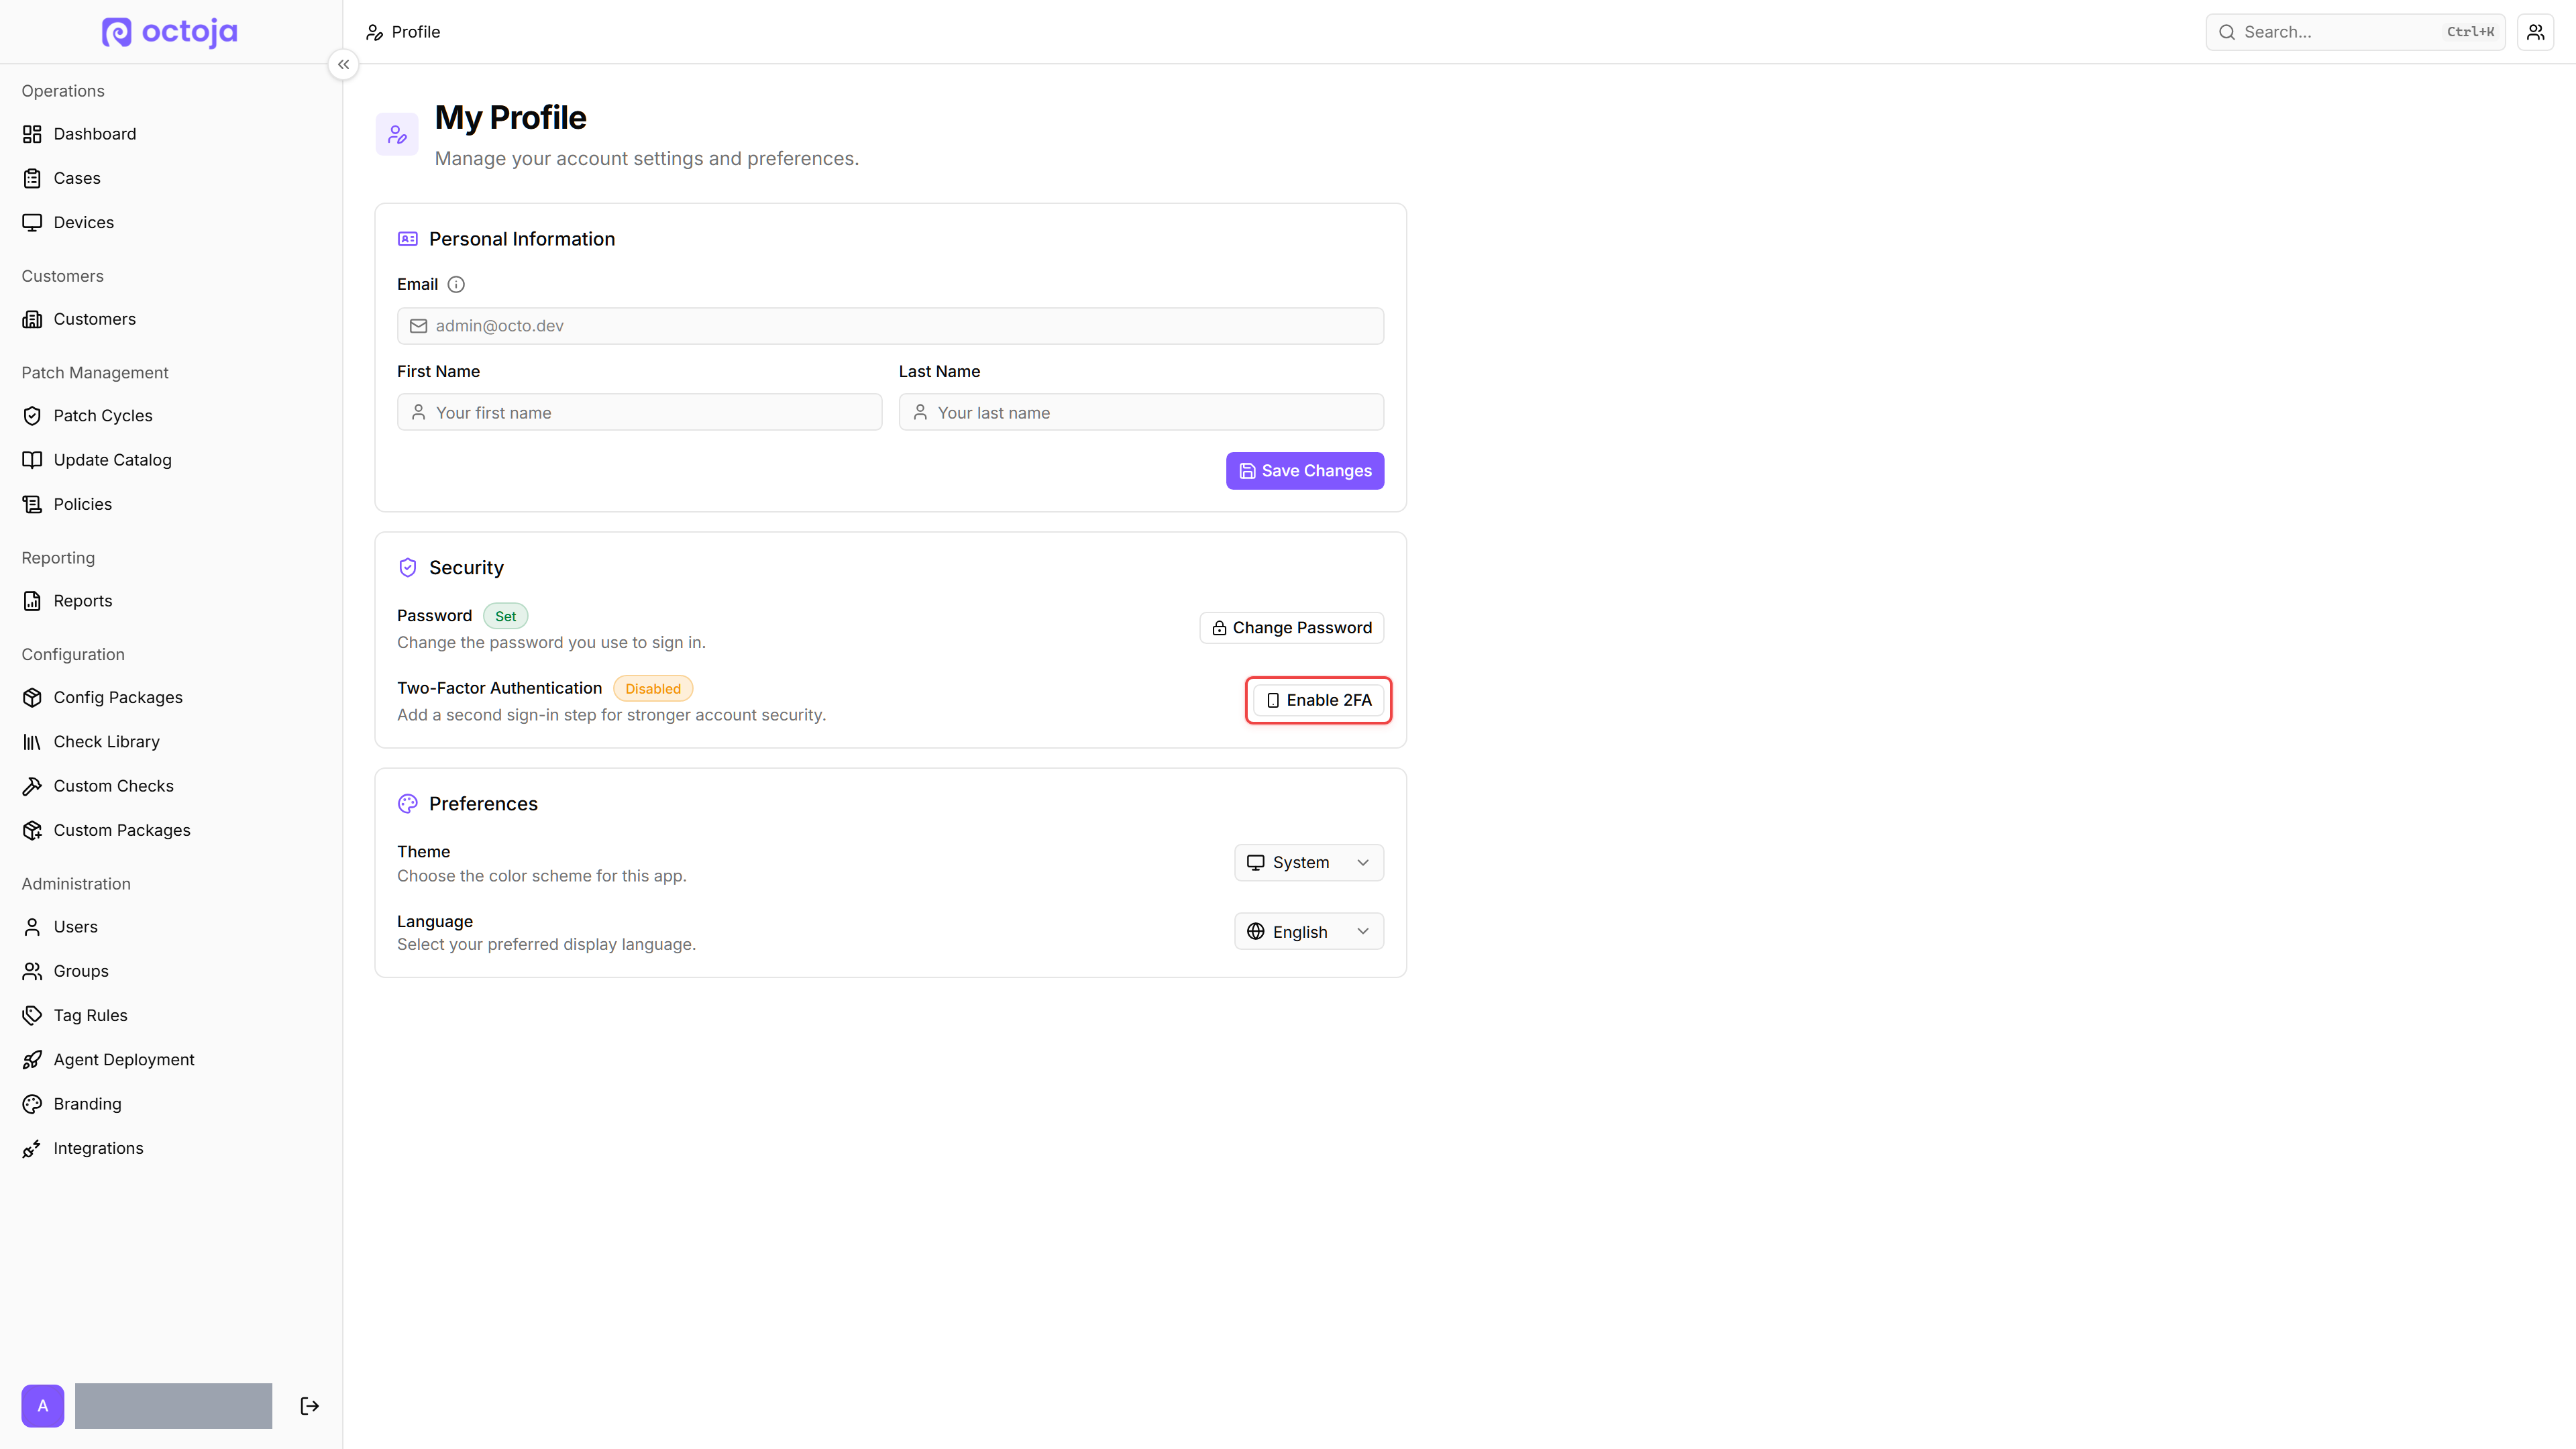
Can't scan the QR code? The setup dialog also shows a Manual entry key — enter this key manually in your authenticator app instead of scanning.
From the next sign-in onward, you will be asked for a code from your authenticator app in addition to your password.
If 2FA is already active on your account, the button in the Authentication section reads Disable 2FA instead of Enable 2FA. Click it to remove 2FA from your account; you can run the setup steps above again afterwards to re-enroll with a new device.
Admin: enable or remove 2FA for another user
Administrators can enable 2FA on a user's behalf during initial setup, or remove it later if the user loses access to their authenticator app. To give a user a fresh start, remove their existing 2FA setup and have them enroll again. Use this path when onboarding a new user who needs help, or when an existing user has lost their phone.
- Go to Administration → Users in the left sidebar.
- Click the user whose 2FA you want to enable or remove.
- If the user does not yet have 2FA, click Setup 2FA. If the user already has 2FA active, click Remove 2FA, confirm the dialog by clicking Remove 2FA again, then click Setup 2FA to start a fresh enrollment.
- Hand the phone or screen to the user so they can complete the setup as described in the self-service section above: scan the QR code, enter the verification code, click Verify & Enable.
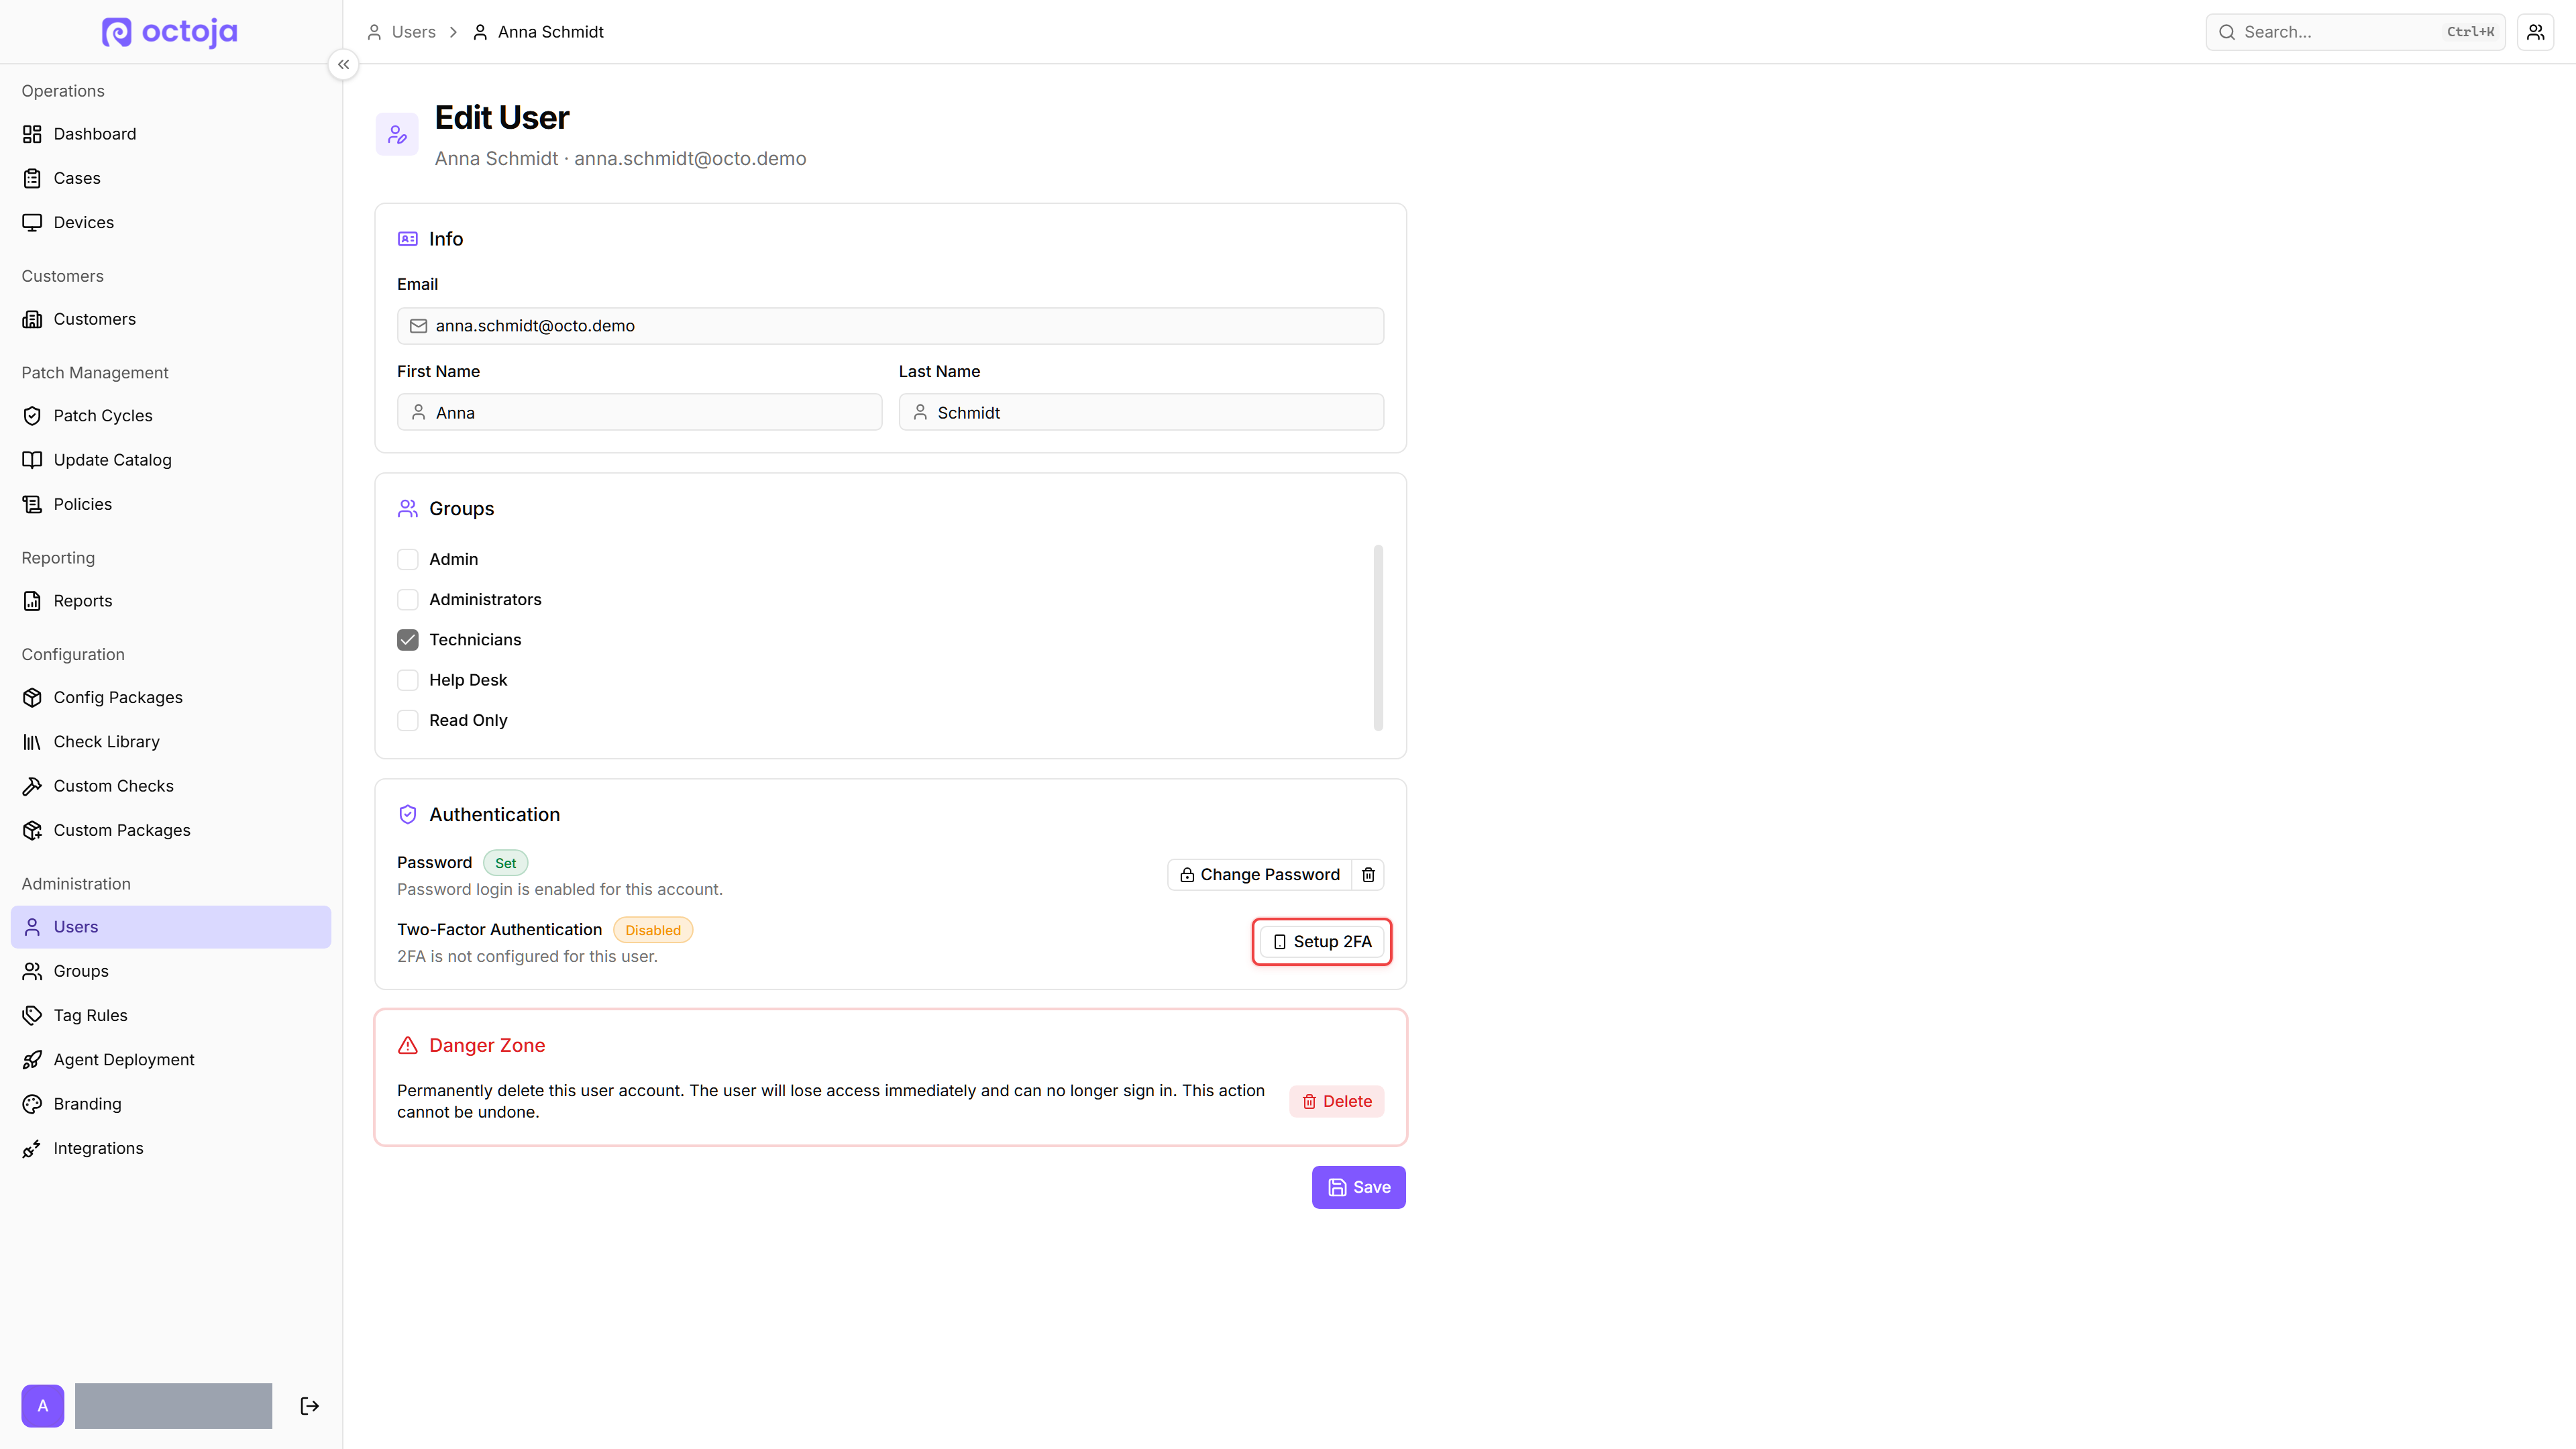
Lost your phone?
If you lose access to your authenticator app, ask an administrator to remove 2FA on your account using the admin path above. You can then set it up again with a new device.
Tip: Some authenticator apps (like Authy or Microsoft Authenticator) support cloud backup, which lets you restore your codes on a new phone. If your app offers this, enable it during setup to protect yourself in case your phone is lost or replaced.